How to Repair Sash Windows A Homeowner's Guide
Learning how to repair sash windows is all about correctly diagnosing common problems like rot, sticking frames, and draughts, then applying the right fix. The key is to know when to carefully excavate decayed timber, when to replace broken cords, and how to install modern draught seals. Get this right, and you'll preserve your home’s character while seriously boosting its efficiency.
Why Repairing Your Sash Windows Is the Smart Choice

If you live in a period home, you already know the unique charm of original sash windows. Their elegant proportions and craftsmanship are central to your property’s architectural character. But you’re probably also familiar with the frustrations: rattling frames, frustrating draughts, and sashes that stubbornly refuse to open.
When faced with these problems, the temptation to just replace them with modern UPVC can be strong. Honestly, though, choosing repair over replacement is often the smarter, more rewarding path. Original sash windows were built from old-growth timber, a dense and durable material that’s far superior to the fast-grown wood used today. They were designed to be maintained, not thrown away.
Preserving Character and Value
Opting for repair is about more than just getting a window to work again; it's about stewardship. Restoring your windows preserves the authentic soul of your home. This commitment to heritage isn’t just sentimental—it directly impacts your property’s market value. Estate agents will tell you that original period features are key selling points, and well-maintained sash windows are right at the top of that list.
For many homeowners, the decision is also a financial one. It’s a common misconception that replacement is the only long-term solution. In fact, repairing sash windows in the UK can save you 40-60% compared to a full replacement. A recent survey even revealed that 60% of UK homeowners prefer repairs to maintain heritage features.
What's more, properly refurbished windows with modern draught-proofing can slash your annual energy bills by up to £235—a significant saving that really adds up over time. You can learn more about the surprising benefits of updating your home's windows and see how the investment pays off.
A Practical Approach to Common Problems
This guide is here to give you the confidence and knowledge to tackle the most common issues yourself. We’ll break down the process into clear, manageable steps, from solving sticking sashes to replacing rotten sills and reglazing panes.
Before you dive in, just remember that every window tells a story. A successful repair isn't about making it look brand new; it's about honouring its history while ensuring it performs beautifully for decades to come.
We’ll also help you figure out which jobs are perfect for a weekend project and when it’s probably wise to call in professionals like us at All Well Property Services.
To get started, the table below will help you diagnose your window's symptoms and point you toward the right solution.
Quick Diagnostic: Your Sash Window Problems and Solutions
Use this table as a quick reference to figure out what's wrong with your sash windows and what the typical fix involves. It's a great starting point before you decide whether to DIY or call for backup.
| Symptom | Common Cause | Typical Repair Solution |
|---|---|---|
| Window won't stay open | The sash cord has snapped or stretched, or the weight has detached inside the frame. | Replace the sash cord and reattach or replace the sash weight. |
| Window is stuck or hard to open | Layers of old paint have built up, or the frame has swollen due to moisture. | Carefully scrape away excess paint from the runners and parting beads. Sand smooth. |
| Rattling in the wind | Worn or missing staff beads and parting beads, creating gaps around the sashes. | Replace the beads and install brush pile draught-proofing strips for a snug fit. |
| Draughts coming through | Gaps around the sashes, poor-quality putty, or thin, old glass. | Install a complete draught-proofing system and check/replace the putty. |
| Rotten wood on sill or frame | Prolonged exposure to moisture, often due to cracked paint or failing putty. | Excavate the rotten timber back to sound wood and splice in a new, treated timber section. |
| Condensation between panes | Only applies to double-glazed sashes. The seal on the unit has failed. | The double-glazed unit itself needs to be replaced. |
| Cracked or broken glass | An impact, or stress on the pane from a distorted frame. | Carefully remove the old putty and glass, then install a new pane and re-putty. |
Seeing your window's problem in this list should give you a much clearer idea of what you're up against. With the right diagnosis, you can plan your repair with confidence.
Getting Your Toolkit Ready
Before you even dream of tackling a stiff sash or scraping back peeling paint, your success hangs on having the right gear. A well-stocked toolkit isn't just about making life easier; it's what stops you from cutting corners and doing a bodge job. Getting this sorted from the get-go is half the battle won.
Think of it as setting up your workstation. You don’t need a lorry-load of expensive kit, but a few specific, decent-quality tools will make every task simpler and safer. A good example is a parting bead remover – it’s designed to gently coax delicate timber mouldings away without splitting them. Try that with a standard screwdriver and you'll likely hear a heart-breaking crack.
And a sharp set of chisels? Absolutely non-negotiable for cutting out rotten timber cleanly. You’ll want a few different sizes, from a slim 6mm for getting into tight corners to a broader 25mm for clearing out bigger sections of decay. Sharpness is everything here; it’s the difference between a clean, professional finish and a chewed-up mess.
Choosing the Right Stuff for Timber Repairs
When it comes to materials, knowing what to use and when is crucial for a repair that actually lasts, especially on a period property. Believe me, not all wood fillers are created equal.
Standard Wood Filler: This is fine for tiny cosmetic jobs – filling old nail holes or minor surface cracks. It’s easy to sand, but it has no structural integrity. Don’t expect it to hold a corner together.
Two-Part Epoxy Resin Filler: For any area suffering from rot, this is the only product that will do the job properly. You mix a resin and a hardener, and it sets into an incredibly tough, waterproof bond that effectively becomes one with the wood. It’s what the pros use to rebuild decayed sills and frames for a reason.
Before you even think about slapping on filler, you must treat the affected area with a wood hardener. This is a thin liquid that soaks into the soft, spongy fibres of the decayed timber and solidifies them, giving the epoxy a solid base to grip onto. Skipping this step is a classic mistake and pretty much guarantees the repair will fail within a couple of years.
Essentials for Glazing and a Proper Finish
The finishing touches are just as important as the structural work. If you're re-glazing, traditional linseed oil putty is the only real choice for period windows. Unlike modern silicones, it stays slightly flexible, which allows the timber frame to expand and contract with the seasons. This stops the glass from cracking under pressure.
When you get to painting, always start with a high-quality wood primer. A good primer helps the topcoats stick properly and adds another layer of defence against moisture. For the final coats, look for a microporous paint system. This lets the timber breathe, which is exactly what you want.
Finally, a word on safety. Don’t be a hero. Always have this gear within arm's reach:
- Tough Work Gloves: Protect your hands from splinters and sharp edges.
- Safety Goggles: An absolute must for shielding your eyes from flying bits of wood, putty, or anything else.
- Dust Mask: Essential when sanding down old paint, which could very well contain lead.
Remember, the aim is to use materials that work with the original window, not against it. Using modern, inflexible fillers and sealants on old timber is a surefire way to trap moisture and cause even more rot down the line.
Dealing With Sticking Sashes and Broken Cords
Two problems plague owners of old sash windows more than any other: the sash that stubbornly refuses to move, and the sudden, heart-stopping thud of a window crashing shut. These aren't just little quirks; they compromise your home's ventilation, its security, and frankly, your daily patience. The great thing is, both are entirely fixable, often with just a few hours of work.
A sticking window is usually the result of decades of layered paint, or sometimes the timber swelling slightly from moisture. A broken sash cord, on the other hand, is just a simple case of wear and tear. Getting these jobs sorted yourself is a real rite of passage for any period homeowner.
Releasing a Stuck Sash Window
Before you can fix a stuck window, you need to figure out why it's stuck. Is it sealed shut with paint, or is the wood itself just too tight in the frame? Most of the time, it's a bit of both. Your first job is to break the paint seal that's effectively glued the sash to the staff and parting beads.
Grab a sharp utility knife and carefully score the line where the moving sash meets the frame. Do this on the inside, outside, and along the meeting rails where the top and bottom sashes connect. Take your time with this – you're trying to slice through the paint, not gouge the timber.
Once you've scored all the edges, you can often free the window with a bit of gentle persuasion. Try giving it a firm push from the outside. If it's still not playing ball, place a small block of wood against the sash stile (the vertical part) and give it a few firm but controlled taps with a hammer. That little shock is often enough to break the last of the paint's grip.
If the window moves but is still really tight, then friction is your problem. This means either the channels are clogged with debris and old paint, or the wood has swollen. The only real fix is to take the sashes out for a proper sand and clean.
My main tip here is to work smarter, not harder. Brute force will probably just damage the delicate timber mouldings. You want to apply targeted pressure exactly where the window is binding.
To get the sashes out, you'll need to carefully pry off the staff beads on one side. Once they're off, the bottom sash can be lifted out. The parting bead—that thin strip of wood separating the two sashes—can then be slid out, letting you remove the top sash.
With the sashes out, you can give the channels inside the window box a thorough clean and sanding. Lightly sand the edges of the sashes themselves, too. A quick coat of wax polish on the running surfaces before you put it all back together will make a huge difference, ensuring a smooth glide for years to come.
How to Replace a Broken Sash Cord
That snapping sound of a sash cord giving way is something every period homeowner dreads. Suddenly, your window is either useless or dangerously heavy. Replacing a cord is a bit more involved than freeing a stuck sash, but it’s definitely achievable. Once you've done it, you'll understand exactly how the counterweight system works.
The first step is the same: you have to remove the sashes as we just described to get into the window box. Once the sashes are safely out of the way, you'll spot a small removable panel on the side of the frame, known as the pocket or weight box cover.
This visual guide shows the core tools you'll need for most timber repairs, from clearing out decay to priming the wood for a lasting finish.
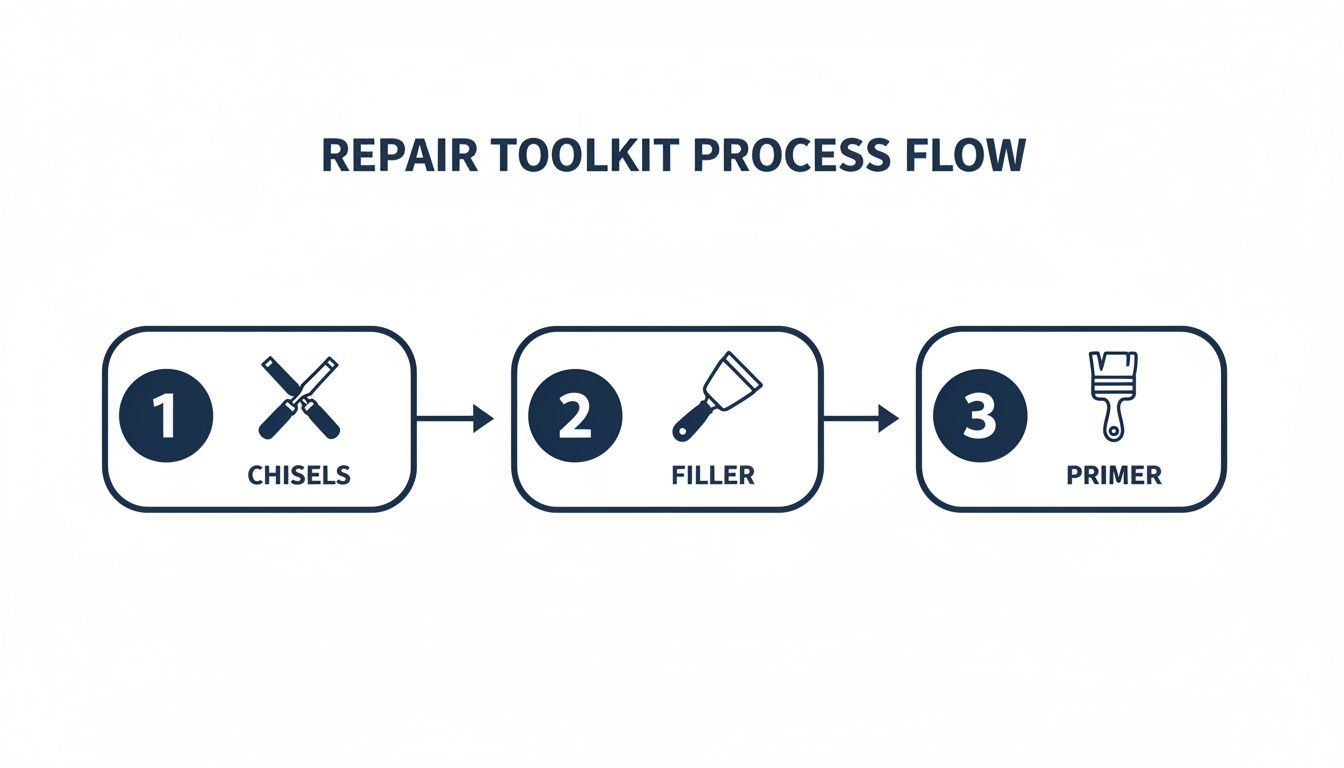
This process shows how fundamental tools like chisels, fillers, and primers form the foundation of any successful window restoration.
Carefully pry this cover off. Inside, you’ll find the cast-iron sash weight hanging from what’s left of the broken cord. Get the old cord off both the weight and the sash itself. Now, you’re ready to thread the new one.
- Sash Cord Material: Always go for a high-quality, pre-stretched waxed cotton sash cord. Steer clear of cheap nylon alternatives; they stretch over time and will throw your window off balance.
- Threading the New Cord: Here’s a good trick: tie a small weight (a nut or a screw works well) to the end of the new cord and feed it over the pulley at the top. Gravity will drop it down into the weight box where you can easily grab it.
Once it's threaded through, getting the length right is the crucial next step. Pull the cord down and tie it securely to the sash weight. Now, pull the weight up until it's just sitting below the pulley. With the sash resting on the windowsill, you can feed the cord into the groove on the side and nail it in place. Trim any excess, and you're good to go.
There's a real financial incentive to learning these skills. Across the UK, basic sash window fixes like replacing cords are just £150–£300 per window, compared to £1,000–£1,500 for new timber replacements. That's a huge saving, especially for Edwardian homes in areas like Balham or Clapham that need heritage-sensitive work. Labour for a single cord replacement typically costs £70–£120, and that per-window cost often drops on bigger jobs. This makes DIY appealing, but it also shows how affordable professional help can be for a job that needs precision. You can learn more about the cost-benefits on London Sash.
Getting the balance right is everything. The weight has to be heavy enough to hold the sash in any position, but not so heavy that it pulls the window open by itself. If you also need to replace a broken weight, the rule of thumb is that the weight should be about half the weight of the sash it’s counterbalancing. Get this right, and you'll have a window that operates with fingertip ease.
Repairing Rotten Timber and Replacing Old Putty
Now we're getting into the more structural side of sash window care. We're tackling two issues that can feel a bit intimidating but are absolutely vital for the window's longevity: rotten timber and failing putty. These two problems usually go hand-in-hand, as cracked putty lets water seep in, which in turn causes the wood to decay.
Ignoring rot is never an option. It's a progressive problem that will only weaken your window frames over time, leading to much bigger and more expensive repairs down the line. The good news? With the right materials and a methodical approach, you can perform durable, long-lasting repairs that save the original timber and preserve your home's unique character.
Identifying and Removing Rotted Wood
First things first, you need to do a thorough inspection. You have to know the full extent of the decay before you start cutting. The most common trouble spots are the window sills and the bottom rails of the lower sashes, as these areas really bear the brunt of the weather.
Gently probe any suspect areas with a sharp tool, like a bradawl or a small screwdriver. Healthy timber feels solid and will offer firm resistance. If the tool sinks in easily and the wood feels soft, spongy, or crumbly, you've found rot. Pay close attention to joints and corners where moisture loves to get trapped.
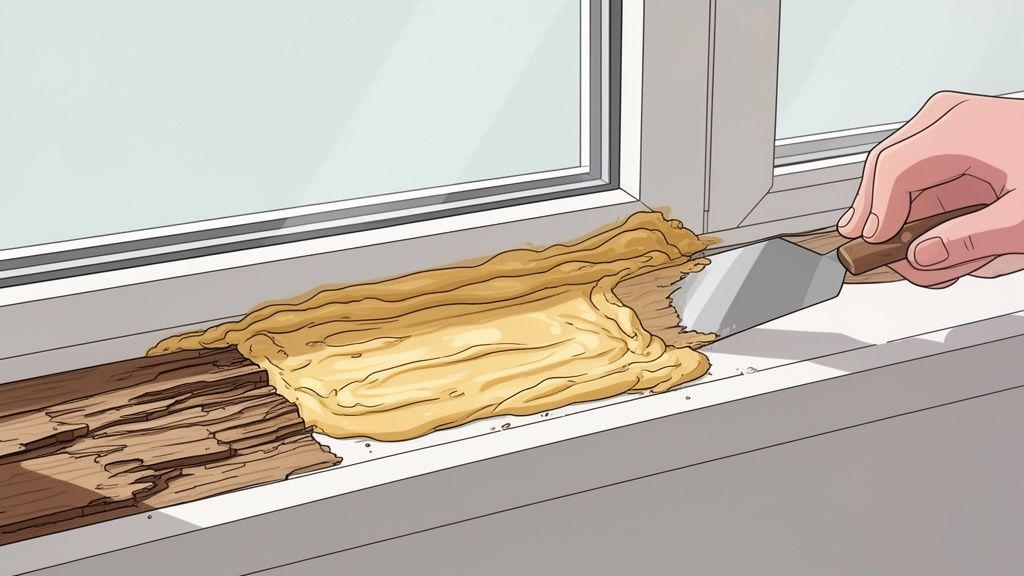
Once you’ve mapped out the damaged sections, it’s time to excavate the decayed wood. Using a sharp chisel, carefully start cutting away the rotten timber. It’s crucial to be thorough here. You must remove all the soft, decayed material until you are back to clean, bright, and solid wood. Any rot you leave behind will just continue to spread, undermining your entire repair.
Stabilising the Timber and Applying Epoxy Filler
With the rotten wood gone, you'll be left with a cavity. Before you can fill this, the exposed sound wood needs to be prepared—a critical step that many people miss. The remaining timber, although solid, might still contain microscopic fungal spores.
To deal with this, you need to apply a wood hardener. This is a thin, consolidant liquid that soaks deep into the wood fibres, neutralising any remaining decay and providing a solid, stable surface for the filler to bond to. Brush it on liberally and let it cure completely, following the manufacturer's instructions to the letter.
Now for the main repair. For any structural timber damage, a two-part epoxy resin filler is really the only choice. Unlike standard wood fillers, epoxy sets incredibly hard and forms a waterproof, structural bond with the timber. You can shape, sand, and paint it just like wood.
Remember, old windows were made from virgin forest timber—a close-grained, resinous material that is simply irreplaceable today. Using epoxy to repair the original wood is far superior to splicing in new, inferior timber. You are preserving a high-quality material that can last for centuries more.
Mix the epoxy according to the instructions, being careful to get the resin-to-hardener ratio exactly right. Press the filler firmly into the cavity with a flexible putty knife, building it up in layers and slightly overfilling to allow for sanding later. You'll have to work fairly quickly, as it has a limited working time before it starts to set.
The Art of Replacing Old Window Putty
Cracked, crumbling, or missing putty is more than just a cosmetic issue; it's an open invitation for water to seep into the wooden frame. Re-glazing a pane with fresh putty is one of the most effective maintenance tasks you can perform.
The first job is to remove the old, hardened putty. This can be a slow, painstaking process. A good-quality hacking knife and a chisel will be your best friends here. Carefully chip away at the old putty, being extremely cautious not to crack the glass or damage the surrounding timber. If the putty is particularly stubborn, a heat gun on a low setting can help soften it, but be careful not to overheat the glass, as it can crack.
Once the bulk of the putty is gone, you’ll see the small metal glazing points or sprigs holding the glass in place. Pull these out with pliers. You should now be able to carefully remove the glass pane.
With the glass out, clean the rebate (the L-shaped channel the glass sits in) thoroughly. Scrape out any remaining bits of putty and sand it smooth. It's good practice to then apply a coat of primer or a thin layer of linseed oil to the bare wood. This stops the timber from drawing the essential oils out of the new putty, which would cause it to dry out and fail prematurely.
Now you're ready to apply the new putty. For period timber windows, always use traditional linseed oil putty. Work a small amount in your hands to warm it up until it becomes soft and pliable.
- Bedding In: Roll a thin sausage of putty and press it firmly into the rebate. This creates a soft bed for the glass to sit on.
- Setting the Glass: Gently press the glass pane into this bedding putty until it sits securely. Then, tap new glazing points into the frame every 15-20cm to hold the glass firmly in place.
- Applying the Face Putty: Apply more putty around the edge of the glass, pressing it in firmly with a putty knife. The final step is creating that clean, angled bevel. Dip your putty knife in a little linseed oil and draw it along the putty at a consistent angle, creating a smooth, professional finish that just covers the rebate but remains below the sightline from inside.
Allow the putty to skin over for at least 7-14 days before painting. When you do paint, make sure the paint overlaps from the putty onto the glass by about 1-2mm. This tiny overlap creates a crucial final seal, preventing water from getting between the glass and the putty.
How to Draught Proof Your Sash Windows
There’s nothing worse than a constant chill coming off a beautiful period window. It can completely ruin the charm of a room, making it feel cold and sending your heating bills through the roof. It’s one of the most common complaints we hear about sash windows, but honestly, it's also one of the most satisfying problems to fix.
Getting the draught-proofing right will make your home feel warmer and quieter, and it stops those annoying rattles without messing with the window's classic look.
The trick is to seal all the little gaps where air sneaks in, but without stopping the sashes from sliding smoothly. We do this by fitting modern, discreet seals directly into the timber parts of the window frame. This is a world away from those crude, stick-on foam strips that peel off and look terrible. This method integrates the seals properly, giving you a permanent and completely invisible fix.
Choosing the Right Draught Seals
You need to target the key culprits: the staff beads, the parting beads, and the meeting rail where the two sashes close together. Each of these spots needs a specific type of seal to do the job properly.
- Brush Pile Seals: These are what we use most of the time because they just work. They’re made of a soft brush strip that sits inside a plastic carrier. We route a small groove into the timber, and the carrier slots in, leaving only the soft brush visible. It creates a gentle but surprisingly firm seal against the sash.
- Compression Seals: You might know these as 'Q-Lon' seals. They're basically rubber or silicone strips that get squashed when the window closes, filling the gap. We often use these for the meeting rail or in places where a slightly tougher seal is needed.
To save a lot of time and hassle, the seals are usually fitted into new timber beads that come pre-grooved. You can buy draught-proofed parting beads and staff beads that are ready to be cut to size and installed.
Installing the Draught Proofing System
First up, you’ll need to carefully take off the existing staff beads and parting beads to get the sashes out, just as we covered in the previous sections. With the sashes removed, you've got clear access to the window box.
Now you can swap out the old, plain beads for the new ones with the brush pile seals built in. The new parting bead goes into its groove between the sashes, where its brush seal will press against the outer face of the top sash and the inner face of the bottom one. Then, you fit the new staff beads, and their seals will press snugly against the inner face of the bottom sash.
For the meeting rail, we usually rout a groove into the top of the bottom sash's rail (or the bottom of the top sash's rail) to take a brush or compression seal. When you close the window, this creates a tight seal right across the middle. Job done.
Draught-proofing is, without a doubt, the single most effective thing you can do to boost the energy efficiency of original sash windows. It's the perfect bridge between historic character and modern comfort, and it often gives you a better return on your investment than other, more complicated repairs.
Putting your money into professional draught-proofing can be a very smart move. In 2026, data showed that the average cost to fully refurbish a sash window in the UK is between £620–£920. In comparison, draught-proofing on its own comes in at a more modest £318 per window.
Keep in mind that labour costs in London are typically 15–20% higher, which makes professional work a calculated choice against the much steeper cost of a full window replacement.
This whole process is a fundamental part of bringing a period window up to modern standards. If you want to dive deeper into getting your home ready for winter, have a look at our guide on home insulation and energy-saving tips.
Knowing When to Call a Professional
While this guide gives you the confidence to fix many common sash window problems, it’s just as crucial to know when to step back and call in a specialist. Honestly, recognising your own limits is the key to a successful repair and protects the precious, original features of your home. Some issues just demand a level of skill, specialist tools, and experience that go way beyond the average DIY setup.
Trying to tackle a complex repair without the right know-how can quickly turn a small problem into a much bigger, more expensive one. If you come across any of the following signs, it's probably time to put the tools down and pick up the phone.
Red Flags for a DIY Repair
Think about getting professional help when you run into these situations:
- Widespread or Structural Rot: If the rot isn't just a small, contained patch on a sill but has spread deep into the main frame (the box), that's a different beast entirely. When the timber feels weak or spongy to the touch, you're dealing with a structural problem that needs an expert. A professional can properly assess the damage and carry out specialist timber splicing or even rebuild the frame.
- Severely Warped Sashes: A sash that's badly twisted or bowed often can't be fixed with a bit of sanding. This usually calls for professional joinery to correct the shape, and in some cases, a new sash might need to be crafted to perfectly match the original profile.
- Work on Listed Buildings: If your home is Grade I or II listed, any work on your windows—even repairs—will require Listed Building Consent. This isn't something to take lightly. Professionals are well-versed in navigating these strict regulations and will use the correct conservation-approved materials and techniques to keep everything above board.
Your home’s original windows are irreplaceable assets. A professional repair not only fixes the problem but also ensures the historical and architectural integrity of your property is preserved for future generations.
If you’re facing a significant restoration project, getting expert advice from the start is invaluable. For a detailed assessment and a professional approach, you can learn more about our dedicated sash window restoration services in London and see how we can help.
Your Sash Window Repair Questions, Answered
Even with a good guide in hand, there are always a few questions that pop up once you start looking closely at a hands-on project. Getting to grips with sash window repair means understanding the quirks of period homes, so it’s only natural to have queries before you dive in. We’ve pulled together some of the most common questions we hear from homeowners.
Can I Fit Double Glazing into My Original Sash Windows?
This is one we hear all the time. The short answer is yes, but it’s absolutely a job for specialists. Original sash boxes and frames simply weren’t designed to carry the weight or thickness of standard double-glazed units. Trying to force them in is a recipe for damaging the frame and wrecking the window's delicate balance.
Professionals have a couple of clever ways to do this properly:
- Slimline Double Glazing: This method involves carefully routing out the existing sash rebates to accommodate ultra-thin, lightweight double-glazed units that the original frames can handle.
- New Sashes in Original Boxes: Craftsmen can build entirely new sashes fitted with double glazing, perfectly matching the original profiles, which are then installed into your existing window box.
Both routes preserve that all-important period look while seriously improving thermal efficiency. But make no mistake, they require precision joinery that’s well beyond a typical DIY weekend project.
How Often Should My Sash Windows Be Repainted?
For timber windows, a regular painting schedule is your best form of preventative maintenance. As a rule of thumb, the exterior surfaces should be repainted every 5-8 years to shield the wood from UV damage and moisture.
But don't just blindly follow a schedule. The real trick is to inspect them regularly. Once a year, have a good look for any signs of cracking, flaking paint, or failing putty. These are the early warning signs that the protective barrier is starting to break down, telling you it’s time for a touch-up.
Pro Tip: Always, always use a high-quality, microporous paint system. Unlike modern plastic-based paints that can trap moisture and cause rot from within, microporous formulas allow the timber to breathe. This simple choice helps prevent decay and makes the paint job last much, much longer.
Is It Worth Repairing a Window with Significant Rot?
In almost every single case, yes. It’s genuinely amazing how much rot can be successfully and permanently repaired by someone who knows what they’re doing. Modern epoxy resin systems allow skilled joiners to excavate the decayed timber and rebuild sills and frames to be even stronger than the original wood.
A full replacement should always be the absolute last resort, especially when you consider the quality of the old-growth timber used in period windows—it’s far superior to most modern timber. A professional assessment can determine if the frame is structurally sound enough for a lasting repair. It’s nearly always more cost-effective and is certainly better for preserving your home's unique character.
For complex repairs or when you simply want the peace of mind of a professional finish, All Well Property Services provides expert sash window restoration across London. We blend traditional craftsmanship with modern techniques to protect your home's heritage. Contact us today for a fixed quote and a flawless result.
Free tools to help plan your project
No email required. Get instant estimates and planning answers.
Planning Risk
Traffic-light check of every planning restriction at your postcode: listed buildings, conservation areas, Article 4 directions, Tree Preservation Orders, flood zones. Live data from Planning.data.gov.uk.
Post-Reno Value
Estimate what your property will be worth after planned renovation works. Select the improvements you're considering and get an estimated post-renovation value with a per-improvement breakdown and ROI figure.
VAT Rate Calculator
Find out whether your renovation qualifies for the 5% reduced VAT rate or zero rate under HMRC rules. Enter your property status and project value to see your potential saving.
EPC Upgrade
Find your home's current EPC rating and see what it would cost to upgrade to a B. Uses live data from the EPC Open Data register.
Related projects in your area
Real kitchen extensionswork we've done in the boroughs covered in this article. Fixed-price contract, single project manager, full Building Control sign-off.
Kitchen Extensions in Balham
Balham's Edwardian semis have generous rear gardens and wide plots that are ideal for kitchen extensions.
Bathroom Fitting in Balham
Balham bathrooms range from quick refreshes in rental flats to full luxury overhauls in family homes.
Loft Conversions in Balham
The Edwardian semis on streets like Boundaries Road, Ramsden Road, and Ritherdon Road are some of the best loft conversion candida
Property Renovation in Balham
Balham renovations are usually one of two types: either a young family buying an unrenovated Edwardian semi and doing the whole th
Kitchen Extensions in Clapham
Clapham families love their kitchen extensions, and we get it.
Bathroom Fitting in Clapham
Clapham clients tend to spec their bathrooms on the premium end: Duravit sanitaryware, Crosswater brassware, large porcelain wall