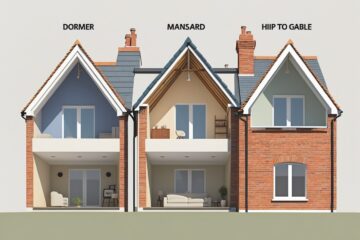
London’s terraced houses brim with personality, but their old-school layouts? Not so much. Many folks end up squeezed into narrow galley kitchens at the back, battling for daylight and elbow room when cooking or hosting friends.
A smartly planned kitchen extension can turn your terraced house into a bright, welcoming family space—and maybe even bump up your property value by as much as 20%. Whether you’re eyeing a straightforward side return, a rear extension, or a wraparound, the right design really can flip your day-to-day living upside down (in a good way).
It all starts with picking an extension style that fits your terrace and your family’s needs. Clever glazing, open layouts, and connecting indoors with the garden can make even a modest extension feel way bigger than it looks on paper.
Key Takeaways
- Side return and rear extensions are usually the top picks for squeezing more space from London terraces
- Skylights, bi-fold doors, and smart glazing can totally change a gloomy kitchen into a sunlit hangout
- Extensions need careful planning to meet London’s building regulations and keep neighbours on side
Understanding Terraced House Layouts
Terraced houses in London each have their own architectural quirks that shape how you can plan an extension. Over the years, different eras brought unique room sizes and structural setups—these details really matter when you want to maximise space.
Victorian Terraces
Victorian terraces usually measure 4-5 metres wide and 12-15 metres deep. They come with high ceilings—2.7 to 3 metres on the ground floor—which is a big plus for extensions.
The classic layout has a front parlour, a middle reception, and a tiny kitchen at the back. A narrow hallway hugs one side and leads to a steep staircase. Room sizes stay on the small side—kitchens around 3×3 metres, reception rooms about 3.5×4 metres.
Victorian terraces use solid brick walls, about 225mm thick. Their foundations are usually shallow lime mortar. Load-bearing walls run both with and across the street, which shapes your extension options.
Most have compact rear yards—6-8 metres deep. Side returns are narrow, just 1-1.2 metres wide, but that’s prime space for extending. Original features like cornicing, fireplaces, and sash windows add charm, though they can complicate your plans.
Edwardian Terraces
Edwardian terraces (built 1901-1910) give you a bit more breathing room than Victorians. They’re typically 4.5-5.5 metres wide, with similar depths—13-16 metres.
Room proportions improved in this era. Kitchens grew to about 3.5×3.5 metres, and reception rooms stretched to 4×4.5 metres. Ground floor ceilings stayed generous, too—2.8-3.2 metres.
Hallways shifted to let in more natural light. Many Edwardians have wider side returns (1.2-1.5 metres), and their rear gardens often run 7-10 metres deep.
Later Edwardians introduced cavity walls. Structural tweaks like steel lintels became more common. You’ll spot picture rails, plate rails, and larger sash windows that let in extra light.
Modern Terraces
Post-war terraces (from the 1960s) look and feel different. They’re usually 5-6 metres wide and 10-12 metres deep.
Some original layouts went open-plan. Kitchens grew to about 3.5×4 metres, but ceiling heights dropped to 2.4-2.6 metres. Reception rooms are around 4×5 metres.
Cavity wall construction and concrete foundations became the norm. Modern structural methods make extensions easier to plan. You know exactly which walls carry the load, so there’s less guesswork.
Side returns are wider—1.5-2 metres. Garden sizes jump around from 6-12 metres, depending on the area. Decorative features are rare; function takes priority.
Single-Storey Rear Extensions
Single-storey rear extensions are often the go-to for opening up a terraced house kitchen. They usually stretch 3-6 metres from the original rear wall and can turn a poky Victorian kitchen into a roomy, open-plan spot for the whole family.
Design Options
Open-plan layouts really shine in rear extensions. You can blend your kitchen, dining, and living zones into one big space that feels much larger than it is.
L-shaped designs make great use of corners. This setup wraps around the house and carves out zones for cooking, eating, and relaxing—all while keeping things visually connected.
Galley-style extensions work well for narrow terraces. Put the kitchen units on one wall, dining opposite, and you’ll have a practical flow that just works.
Roof choices matter a lot. Flat roofs with big roof lights bring in tons of daylight. Pitched roofs blend in with the house but can shrink headroom. Mono-pitch roofs split the difference, mixing character with a modern feel.
Think about ceiling height. Standard 2.4-metre ceilings are fine, but if you can stretch to 2.7-3 metres, the space feels miles bigger. Higher ceilings need extra structural planning but the payoff is worth it.
Permitted Development
Depth rules cap rear extensions at 3 metres for terraces under permitted development. That limit often shapes your whole design.
Height restrictions mean you can’t go above the current eaves. Extensions must stay under 4 metres total height or 3 metres at the eaves if you’re close to the boundary.
Materials need to match your house. No wild brick colours or clashing render unless you get planning permission.
Area limits say you can’t cover more than 50% of your original rear garden—including sheds and old extensions.
With planning permission, you can push past the 3-metre rule, use modern materials, and get more creative with the design.
Bi-Fold Doors
Full-width bi-folds can turn a rear extension into a real inside-outside space. You’ll usually see 3, 4, or 6-panel doors, depending on how wide you can go.
Choosing frames makes a difference. Aluminium frames look sleeker and last longer than uPVC. Timber frames have a classic look but need extra care.
Thresholds matter for daily life. Flush thresholds make for smooth transitions to the garden but need careful waterproofing. Raised thresholds keep out rain and still allow easy access.
Security’s a big deal in London. Multi-point locks and laminated glass are a must. Adding internal glazed doors between the kitchen and living room can boost security, too.
How the doors open affects how you use the space. Traffic doors let you nip out to the garden without folding everything back. Corner glazing where bi-folds meet side windows looks stunning and floods the space with light.
Side Return Extensions
Side return extensions make use of that skinny strip along Victorian and Edwardian terraces, turning wasted space into something genuinely useful. They usually need planning permission, offer loads of design options, and can boost your property value by 10-20%.
Planning Issues
Most side return extensions need planning permission because they’re bigger and can affect neighbours. Going past the original rear wall generally takes you outside permitted development.
You’ll need to send in detailed architectural drawings showing the size, materials, and how the extension relates to neighbouring homes. Planners look at things like privacy, light, and how the extension fits the street.
Key planning points:
- Leave at least a 1-metre gap from boundary walls
- Stick to maximum height limits
- Position windows to avoid peeping into neighbours’ gardens
- Use materials that match the house
The planning process usually takes 8-12 weeks. Getting pre-application advice from the council costs £100-300 and can flag up problems before you get too far.
Building regulations are a separate hurdle. They check for things like structural safety and insulation.
Design Choices
Good side return design means loads of light and a smooth flow between indoors and out. Most people knock through to create an open-plan kitchen-diner.
Key design features:
- Roof glazing: Skylights or lanterns brighten the centre of the home
- Rear glazing: Wide bi-fold or sliding doors open straight onto the garden
- Open-plan layout: Take out internal walls for a sense of space
- Kitchen islands: Great for prepping food and casual meals
Material choices really set the mood. Exposed brick, polished concrete, and Crittall-style glazing can give a modern twist but still nod to the house’s Victorian roots.
Built-in storage makes sure your new space doesn’t get messy. Think cupboards, under-bench seating, even tucked-away utility spots—these keep things tidy and practical.
Mixing up floor finishes can help define zones. Tiles under the cooker, wood in the dining area—no need for walls, just a subtle visual cue.
Cost-Benefit
Side return extension costs in London usually range from £50,000 to £120,000. The price depends on your chosen specification and finishes.
Basic extensions with standard finishes start around £50,000. If you want a premium project with a high-end kitchen, expect to pay £120,000 or more.
Typical cost breakdown:
| Element | Cost Range |
|---|---|
| Basic structure | £40,000-£50,000 |
| Kitchen fit-out | £15,000-£25,000 |
| Glazing and doors | £8,000-£15,000 |
| Professional fees | £5,000-£10,000 |
Professional architectural drawings usually cost £795 to £2,000. The complexity of the project affects this range.
Building regulations and planning applications add another £1,000 to £2,000 in fees.
The return on investment usually falls between 10% and 20% property value increase. For example, a £70,000 extension on a £600,000 property often adds £80,000 to £100,000 in value.
Side return extensions make better use of wasted space compared to rear extensions. You gain more floor area without sacrificing garden space, which families love.
Functional benefits go beyond money: you get more natural light, a better kitchen, and a nicer space for entertaining. These upgrades really do make daily life more enjoyable.
Double-Storey Extension Considerations
Double-storey extensions in London need careful planning and a solid understanding of structural demands. Regulations get stricter for two-storey builds, and you’ll need to consider foundations, walls, and the impact on neighbours.
Permissions
Most double-storey extensions on terraced houses in London require full planning permission. Permitted development rights rarely apply for two-storey rear extensions that go beyond 6 metres.
Planning requirements include:
- Detailed architectural drawings
- Structural calculations
- Neighbour consultation process
- Local authority design compliance
The planning process usually takes 8 to 12 weeks. Your extension can’t exceed 50% of your original house footprint in most cases.
Party wall agreements are mandatory if you build within 3 to 6 metres of a neighbouring boundary. These legal steps protect your neighbours and might add 2-3 months to your timeline.
Conservation areas come with extra rules about materials, design, and visual impact. Listed buildings need separate consent on top of planning permission.
Structural Implications
Double-storey extensions demand major foundation work and careful load-bearing calculations. In many Victorian and Edwardian terraced houses, the existing foundations may need underpinning to support the extra weight.
Key structural considerations:
- Foundation depth and reinforcement
- Load-bearing wall modifications
- Roof tie-ins and structural connections
- Building regulation compliance
Party walls need careful analysis to avoid damaging neighbouring homes. A structural engineer should assess the soil and design the right foundations.
Building regulations approval covers structural safety, insulation, and fire safety. The two-stage process includes plan checks and on-site inspections.
Costs jump compared to single-storey extensions due to scaffolding, more complex structure, and longer build times.
Kitchen Layout Ideas for Extensions
The right layout can turn a terraced house kitchen extension into the heart of your home. There are three main approaches to get the most out of your new space.
Open Plan Designs
Open plan layouts remove barriers between kitchen, dining, and living areas. In terraced houses, this helps eliminate the cramped, disconnected feeling of old compartmentalised rooms.
Your kitchen extension benefits from uninterrupted sight lines, making everything feel bigger. Natural light moves easily through the space, so you won’t get those gloomy corners.
Try placing your kitchen along one wall or in an L-shape. This gives you clear zones but keeps things open. The cooking area anchors the room but doesn’t block movement.
Key considerations for open plan success:
- Ventilation: Good extraction keeps cooking smells from spreading everywhere
- Flooring: Use the same materials to tie the space together
- Lighting: Layer lights for different moods and tasks
Think about noise when placing appliances. Keep dishwashers and washing machines away from seating to preserve comfortable conversation zones.
Kitchen Islands
A kitchen island gives you extra workspace and storage. It also acts as a focal point for food prep and casual meals.
Size matters here. Leave at least a metre of clearance on all sides for easy movement. In smaller spaces, a peninsula attached to the cabinets might work better than a freestanding island.
Island functions to consider:
- Extra prep space and storage
- Breakfast bar for quick bites
- Wine storage or display shelves
- Integrated appliances like a dishwasher
Add electrical outlets and plumbing if you want appliances or a sink. Plan these early, as they’ll affect the build.
Keep the island out of your kitchen’s main working triangle. It should help workflow, not block it.
Dining Integration
Connecting dining space to your kitchen extension creates a natural spot for entertaining. In terraced houses, this makes much better use of space than a separate dining room that rarely gets used.
Put your dining area next to the kitchen but keep it out of the main cooking zone. This way, you can chat with guests while prepping food, but they’re not in the way.
Dining integration strategies:
- Built-in banquette seating: Saves space and adds storage underneath
- Extendable tables: Great for both everyday meals and bigger gatherings
- Pendant lighting: Helps mark the dining area within the open space
Try using different floor levels or ceiling treatments to subtly separate dining and cooking zones. A raised platform or dropped ceiling can define the area without putting up walls.
Link your dining area to the garden with large glazed doors. This boosts your usable space in summer and keeps that indoor-outdoor vibe going.
London-Specific Construction Challenges
Building kitchen extensions in London comes with its own set of headaches. Victorian and Edwardian terraced houses bring structural quirks that you can’t ignore.
Planning Permission Complexities
London boroughs enforce strict planning rules. Each council interprets permitted development rights differently, and conservation areas add even more hoops to jump through.
Space Constraints
Most terraced houses have tiny rear gardens. Side returns are narrow, so extension width is limited. You’ll also need to consult with neighbours before you build.
Structural Considerations
| Challenge | Impact |
|---|---|
| Shared walls | Requires party wall agreements |
| Victorian foundations | May need underpinning |
| Existing drainage | Often requires rerouting |
Access and Logistics
Narrow streets make it tough to deliver materials. Parking rules slow down construction. Permits are needed for skips and scaffolding.
Cost Implications
Labour costs in London are high compared to the rest of the UK. Material transport costs more too, thanks to congestion charges. Site prep often uncovers unexpected issues that can eat into your budget.
Neighbour Relations
Dense housing means your build affects several neighbours. Party wall notices are almost always required. Talking to your neighbours early helps prevent delays and arguments.
Building Control Standards
London’s building regulations are tough. Fire safety rules are especially strict in terraced homes, and you’ll need to hit higher thermal performance standards.
Weather delays are common during London’s wet months. Underground utilities often need to be moved during excavation, which can slow things down.
Maximising Light in Extensions
Light can turn a cramped terraced house extension into a bright, inviting space. Smart planning helps your new kitchen extension feel open and connected to the outdoors.
Rooflight placement really matters. Put large rooflights where your old house meets the new extension. This keeps the middle rooms from getting dark and fills your kitchen with natural light.
Consider these glazing options for the best effect:
- Sliding patio doors: Slim frames let in more light than bifolds
- Corner windows: Wrap around two walls for better views
- Fixed picture windows: Big glass panels with minimal frames
- Roof lanterns: Great above kitchen islands in flat roof extensions
Kitchen layout changes how light spreads. L-shaped layouts let light flow into dining areas. Place kitchen units in the older part and use the glazed extension for dining.
Avoid common mistakes that block light. Don’t put tall cabinets on either side of windows, or you’ll block the glow.
Material choices help bounce light around. Light-coloured cabinets, pale stone worktops, and glossy finishes reflect brightness. Well-placed mirrors can double the effect.
High-quality glazing keeps the space bright without overheating. South-facing extensions may need solar control glass to stay comfortable all year.
Mixing several light sources works better than relying on one big window. Combine rooflights, patio doors, and regular windows for the best results.
Extension Costs in London
Kitchen extension costs in London swing wildly depending on type, size, and where you live. Your postcode shapes costs through planning rules and local labour rates.
Side-infill extensions usually land between £70,000 and £90,000. They make use of the narrow alley beside Victorian terraces, so you don’t lose garden space.
Rear extensions come in at £85,000 to £140,000. These open up bigger kitchen-dining areas with garden access, often using mid-range materials like stone worktops.
Wrap-around extensions—where side and rear spaces combine—average around £200,000. Expect bespoke cabinetry, top-end finishes, and more complicated structural work.
| Extension Type | Cost Range | Features |
|---|---|---|
| Side-infill | £70,000-£90,000 | Basic finishes, standard fittings |
| Rear | £85,000-£140,000 | Mid-range materials, possible underfloor heating |
| Wrap-around | £200,000+ | Bespoke design, luxury finishes |
Key cost factors include:
- Location – Conservation areas demand stricter planning compliance
- Materials – Marble will set you back more than Corian
- Structural work – Removing load-bearing walls means installing steel beams
- Planning permission – Usually £2,000-£4,000, depending on complexity
London labour costs top the rest of the UK because of higher demand and tricky city working conditions.
Set aside an extra 10-15% for unexpected issues—think old plumbing or dodgy foundations. Permitted development planning permission is quicker and cheaper than full planning applications.
Standard rules say your extension can’t swallow more than half your garden space.
Choosing the Right Architect & Builder
Picking the right team really shapes your terraced house kitchen extension. You’ll want folks who know their way around Victorian and Edwardian homes—London’s full of them.
Find architects with a focus on residential extensions. Their portfolio should show similar terraced house projects, ideally close to your postcode.
Key Qualifications to Verify
- Architects with RIBA membership
- Builders with NHBC warranty
- Public liability insurance
- Experience with local authority approvals
Ask for references—ideally from clients with similar jobs. Call them up and chat about how things went.
Firms offering end-to-end services can make life easier. They’ll handle both design and build, so there’s less chance of crossed wires.
Get detailed quotes from a few professionals. Don’t just compare price—look at timelines and what’s included too.
Essential Questions to Ask
| Question | Why It Matters |
|---|---|
| How many terraced extensions have you completed? | Shows real experience |
| Can you handle planning permission? | Means less hassle for you |
| What’s your typical project timeline? | Helps set expectations |
| Do you provide warranties? | Protects your investment |
Schedule initial consultations with your shortlist. Lots of architects offer a free first meeting to talk through your ideas.
Check online reviews and see if any complaints have popped up in local authority records. Make sure they’re registered with the right professional bodies.
Your team should know London’s building regs inside out. Local knowledge really does make or break a project here.
Case Studies: London Success Stories
East Dulwich Side Return Extension
This terraced house squeezed every inch out of its side return. The owners moved their downstairs WC and gained real kitchen width.
Bespoke skylights and big glazed doors made the space bright and open to the garden. A once-cramped galley kitchen became a roomy kitchen-diner.
Haringey Flat Roof Extension
A simple 1.5-metre rear extension made a big difference without heavy construction. The design used a full-width sliding door to link dining and garden.
Two large skylights keep the area flooded with daylight. This more affordable approach shows you don’t need a giant extension for a dramatic upgrade.
Battersea Victorian Pitched Roof Extension
This project tackled low ceiling height—a classic Victorian terrace headache. The pitched roof gave them a vaulted ceiling across the new kitchen and dining area.
The gable end fits the house’s original look. Old and new blend together without a hitch.
Hounslow Wraparound Extension
For a growing family, this wraparound extension (1.8 x 3.4 x 7.5 metres) totally changed the floor plan. They carved out several new zones.
| Zone | Function |
|---|---|
| Entry hall | Private entrance |
| Lounge area | Separate relaxation space |
| Kitchen-dining | Open-plan family hub |
The new spaces flow straight out to the garden, making indoor-outdoor living feel easy.
Frequently Asked Questions
Kitchen extensions in terraced houses need careful planning to make the most of tight spaces and keep the home’s character. Here are answers to common questions about layouts, utilities, regulations, and design for London’s terraced homes.
What are some space-efficient layout options for a small kitchen extension in a terraced house?
A galley layout works well in narrow extensions. Cabinets and appliances line up on two parallel walls, so you get an efficient work triangle.
L-shaped layouts use up corner space and keep the middle open. Try putting the sink in the corner, with prep areas on both sides.
For really narrow spaces, a single-wall kitchen is worth considering. All appliances and storage go on one side, leaving space opposite for dining or just moving around.
If you’ve got at least 3.5 metres width, you can fit an island. In smaller extensions, a peninsula layout adds storage without blocking walkways.
How can I incorporate a utility room into my terraced house’s kitchen extension?
A utility zone can fit into a 1.5-metre-wide side return. Tuck the washing machine and dryer behind sliding or bi-fold doors to keep things tidy.
Corner utility areas help you use awkward spaces and keep noisy appliances away from living areas. Sound-dampening materials around machines cut down vibration.
A separate utility cupboard with good ventilation works well for boilers and laundry. Wraparound extensions often have the extra floor space you need for this.
Stacking washers and dryers saves floor area. Just make sure there’s enough ventilation and easy access for maintenance.
What are the considerations for adding a rear kitchen extension to a London terraced home?
Permitted development rights allow single-storey rear extensions up to 6 metres for terraced houses, no planning permission needed. Always check with your local authority, especially in conservation areas.
If your extension sits within 3 metres of a neighbour’s boundary, you’ll likely need a party wall agreement. Give neighbours at least two months’ notice before starting work.
Think about how your extension affects your neighbour’s light and privacy. Don’t break the 45-degree rule measured from their windows.
Victorian and Edwardian terraces often have shallow foundations. You’ll need proper new foundations that won’t undermine what’s already there.
Could you suggest ways to create an open plan kitchen extension that maximises space in a terraced property?
Knock through the wall between your kitchen and dining room for instant openness. If it’s load-bearing, you’ll need a structural beam to hold things up.
Large sliding doors to the garden make your living space feel bigger. Go for doors that slide all the way back to erase the line between inside and out.
Vaulted or cathedral ceilings add height and a sense of airiness. Pitched roof extensions suit the original proportions of terraced houses.
Use an island or peninsula to mark out zones for cooking and relaxing, but keep sight lines open so the space flows.
What are the best L-shaped kitchen extension designs suitable for narrow terraced houses in London?
Side return extensions naturally create an L-shaped plan. The kitchen runs along the rear wall, while the dining area fills the side return.
Put your sink and prep space in the corner where the two arms meet. This creates a handy work triangle with the hob and fridge nearby.
The short arm of the L is a good spot for a breakfast bar or extra storage. It adds function without cramping the space.
You might try different ceiling heights for each part of the L. Maybe a flat roof over the kitchen, and a pitched ceiling for the dining area to add a bit of drama.
How do I maintain the character of my terraced house while modernising the kitchen through an extension?
Match the brickwork and roofing materials to what’s already on your house, especially where people can see them from the street.
Try using reclaimed materials that suit the original Victorian or Edwardian vibe. It makes a difference if you care about the details.
Keep period features like old floorboards, cornicing, and fireplaces in the rooms that connect to your new space.
Let these elements carry into the extension, even if you tweak them a bit for practicality.
Pick window styles that mirror your house’s proportions. Steel-framed glazing gives a modern edge but still respects the tall, classic look.
Work modern conveniences in quietly. Hide appliances behind cabinetry panels and pick finishes that go with the old architectural details.