Extending a terraced house is one of the most popular ways London homeowners create more space and add serious value to their property. From a simple side-return to a full wrap-around, these projects can transform a cramped period layout into the bright, modern home that today’s lifestyle demands.
Unlocking Your Home's True Potential

If you live in a London terrace, you’ll know the charm – but also the limitations. The narrow corridors, small kitchens, and separate living areas that were hallmarks of Victorian and Edwardian design don’t always work for modern family life. This is where extending your home becomes more than just a building project; it’s a complete reimagining of how you live in it.
Think of this guide as your roadmap. We’ll show you how a well-designed extension can turn a dark, disjointed ground floor into a bright, open-plan living area that flows seamlessly into the garden. It’s all about creating a space that works for you, whether that’s a sprawling kitchen-diner for entertaining guests, a quiet home office, or an extra bedroom for a growing family.
What You Will Learn in This Guide
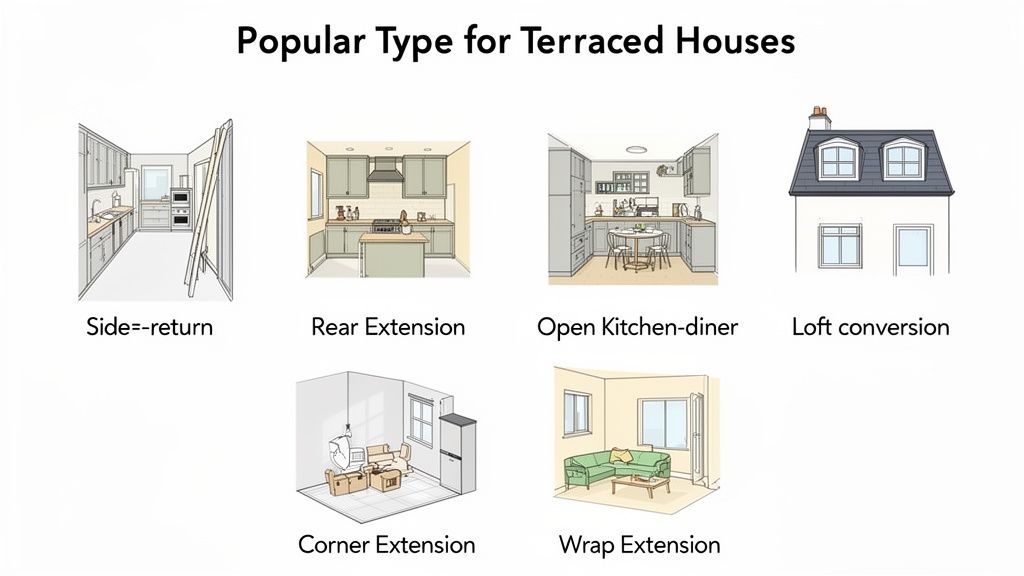
Throughout this article, we’ll get into the practical details you need to know. We'll kick things off by introducing the most common extension types and explaining how each one solves a different spatial puzzle.
- Popular Extension Types: Discover the pros and cons of a rear, side-return, and wrap-around extension, along with loft and basement conversions.
- Navigating Regulations: We'll break down the crucial differences between Permitted Development rights and full Planning Permission, especially within London's tricky conservation areas.
- Managing Neighbours: Learn the essentials of the Party Wall Act and get some real-world tips on how to keep relationships positive during the build.
- Budgeting and Value: Get a realistic look at costs, timelines, and the significant return on investment a well-planned extension can offer.
Think of your existing terraced house as a beautifully written book with a few missing chapters. An extension doesn't just add pages; it completes the story, creating a cohesive narrative that flows from the historic front to a modern, functional back.
This is your starting point for a journey from initial idea to final build. We promise clear, practical advice to help you navigate every step. Our goal is to give you the confidence to add valuable space and enhance your property's character, making sure your vision for a better home becomes a reality. Let’s get started.
Choosing the Right Extension for Your London Terrace
Deciding you need more space in your terraced house is the easy bit. The real challenge is picking the right type of extension—one that fits your home's layout, how you actually live, and of course, your budget. Not all extensions are created equal, and the best choice is always the one that solves your specific problems without wrecking the classic terraced charm.
This is a well-trodden path for London homeowners. The city's iconic Victorian terraces were built for a different era, and adapting them for modern living is practically a local tradition. In fact, an incredible 73.5% of UK homes built before 1919—most of which are these classic terraces—have had at least one major alteration, with extensions topping the list. You can learn more about the long history of adapting terraced houses in the UK.
Let's walk through the most popular options to help you find the perfect fit for your home.
The Classic Rear Extension
Think of a rear extension as the most straightforward way to push your living space outwards. It’s a new single or double-storey structure built onto the back of your property, usually extending the kitchen or living room straight into the garden.
This is the go-to choice for creating a large, open-plan kitchen-diner, almost always featuring bi-fold doors or huge sliding glass panels. The goal here is to blur the line between inside and out, flooding the new space with natural light and creating a seamless connection to your garden—perfect for summer barbecues and family life.
The Clever Side-Return Extension
Many Victorian terraces have a narrow, often useless alleyway running alongside the back part of the house. A side-return extension brilliantly fills in this 'dead' space, squaring off the rear of your home. While it doesn't make your property any longer, it makes it dramatically wider.
This is the ideal solution for transforming a cramped galley kitchen into a more functional, L-shaped open-plan area. The impact is often far greater than the modest square footage suggests, turning a dark, poky part of the house into a bright and airy hub. Skylights or a glazed roof are pretty much essential to make sure the new, deeper space stays beautifully lit.
"A side-return extension is like finding a hidden room you never knew you had. It doesn't steal garden space but instead reclaims forgotten territory, turning a dark side passage into the brightest part of your home."
The Ultimate Wrap-Around Extension
For anyone looking to get the absolute maximum ground-floor space, the wrap-around extension is the ultimate answer. Just as the name suggests, it combines a rear extension with a side-return, wrapping around the back of the house in an L-shape.
This is the most ambitious and expensive of the ground-floor extensions to terraced houses, but the results are truly game-changing. It allows for a complete rethink of your home’s layout, creating a massive, multi-functional space that can easily fit a large kitchen, dining area, and a family living zone all in one.
The Space-Saving Loft Conversion
When sacrificing garden space just isn't an option, the only way is up. A loft conversion transforms your dusty, unused attic into valuable living space, typically adding a master bedroom with an en-suite, a home office, or a playroom for the kids.
For terraced houses, the most common types are:
- Dormer Conversion: A structural 'box' that projects vertically from the slope of the existing roof. This is the most popular option as it adds significant headroom and usable floor space without costing the earth.
- Mansard Conversion: This is a bigger job that involves changing the roof structure itself. It creates a flat roof with a back wall that slopes inwards at a steep 72 degrees. This generally gives you the most space but is also more complex and expensive.
A loft conversion is a fantastic way to add a whole new floor to your home without changing its footprint, which is why it's so popular across London. It neatly separates sleeping quarters from the main living areas, improving the overall flow of the house.
Comparison of Terraced House Extension Types
To help you weigh up the options, here’s a quick comparison of the most common extension types for a London terraced house. This table breaks down what each is typically used for, a rough idea of cost, and how tricky the planning process might be.
| Extension Type | Typical Use Case | Average Cost Estimate | Space Gained | Planning Complexity |
|---|---|---|---|---|
| Rear Extension | Large open-plan kitchen-diner, connecting to the garden. | £40,000 – £75,000+ | Medium-High | Low-Medium |
| Side-Return | Widening a narrow kitchen, creating an L-shaped living area. | £35,000 – £60,000+ | Low-Medium | Medium |
| Wrap-Around | Maximum ground-floor living space, complete layout change. | £65,000 – £120,000+ | High | High |
| Loft Conversion | Adding a master bedroom with en-suite or a home office. | £45,000 – £80,000+ | Medium | Medium-High |
Remember, these are just ballpark figures. The final cost will always depend on the size of the project, the quality of the finishes you choose, and the specific challenges your property presents. It’s always best to get detailed quotes from a few different builders.
Navigating Planning Permission and Permitted Development
The second you decide to build an extension, you’ve stepped into the world of your local council’s rules and regulations. It can feel like a maze of paperwork, but getting your head around two key ideas—Permitted Development Rights and Planning Permission—is the first step to finding a clear way forward for your terraced house project.
Let’s use a simple analogy. Think of Permitted Development (PD) as the standard rules of the road. As long as you stick to the speed limit and stay in your lane, you don’t need to ask for special permission to get where you’re going. Full Planning Permission, on the other hand, is like applying to close off the road for a street party. It’s a formal request for something that falls outside the everyday rules.
Understanding Your Permitted Development Rights
Permitted Development Rights are basically a national thumbs-up from the government, allowing certain types of building work without needing to go through the whole planning application process. They’re designed to let homeowners make common improvements quickly, as long as the project sticks to a strict set of size and design limits.
For terraced houses, these rights are most relevant for single-storey rear extensions. The rules, however, are very specific.
- Size Limits: A single-storey rear extension can't go more than three metres beyond the rear wall of the original house.
- Height Restrictions: The extension can’t be higher than the highest part of your existing roof. If it's within two metres of a boundary, the eaves height can’t be more than three metres.
- Materials: The materials you use must be similar in appearance to the existing house.
These rights offer a faster, cheaper route, but they are not a free-for-all. To really get into the nitty-gritty, check out our ultimate guide to Permitted Development in London, which covers the specific details for homeowners in the capital.
When Full Planning Permission Is Required
You’ll almost certainly need to apply for full Planning Permission if your project pushes beyond the strict limits of Permitted Development. This is a much more involved process where your local council looks at the potential impact of your plans on your neighbours and the street.
You will need a formal application for:
- Larger Extensions: Any single-storey rear extension that goes beyond the three-metre limit.
- Two-Storey Extensions: Adding a second floor to your extension pretty much always requires full permission.
- Wrap-Around Extensions: Because of their scale and impact, these projects fall outside PD rights.
- Properties with Restrictions: If your terraced house is a Listed Building or in a Conservation Area, your PD rights are often severely restricted or removed entirely.
In London, it’s incredibly common for terraced houses to be in Conservation Areas. In these zones, the council's main job is to preserve the area's special character. This means your design will face far greater scrutiny, with a laser focus on materials, window styles, and how well it all fits with the streetscape.
The Application Process in a Nutshell
Submitting a planning application involves getting detailed architectural drawings and design statements prepared, then filling out all the necessary forms. Your architect will normally handle this for you. Once submitted, the council will validate it, let your neighbours know, and assign a planning officer to your case. The whole thing usually takes about eight weeks from validation to getting a decision.
Don't Forget Building Regulations
This is a crucial point that trips people up: Planning Permission and Building Regulations are two completely separate things. Planning Permission is about whether you’re allowed to build and what it will look like. Building Regulations are about how it is built.
These regulations set the technical standards for construction to make sure buildings are safe, healthy, and energy-efficient. They cover everything from the structural integrity of the foundations and steel beams to fire safety, ventilation, and insulation.
Whether your extension is built under Permitted Development or with full Planning Permission, it must comply with Building Regulations. A building control surveyor will need to inspect the work at key stages before issuing a final completion certificate—a vital document you’ll need if you ever decide to sell your home.
Understanding Party Wall Agreements and Neighbourly Relations
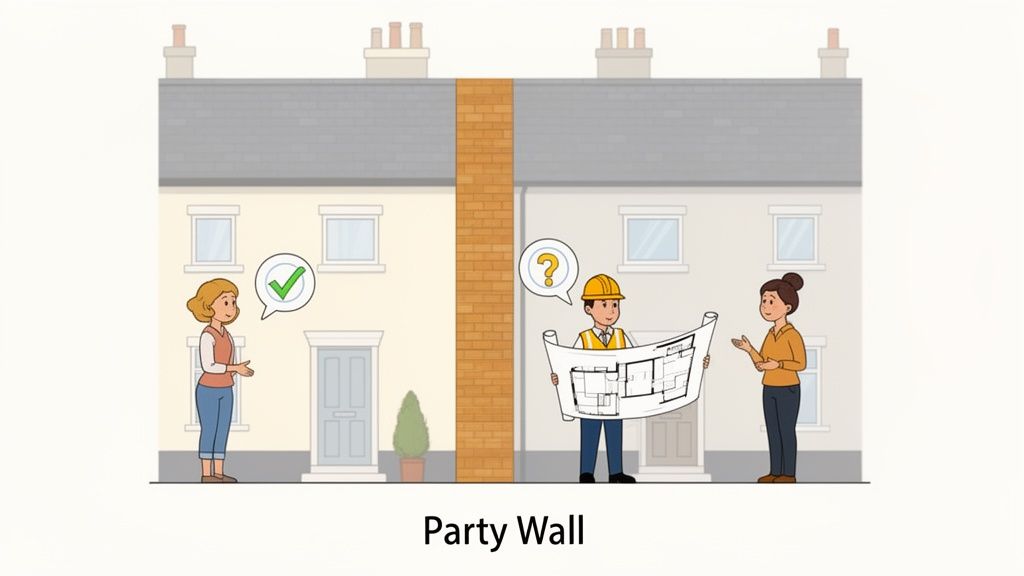
Living in a terraced house means you literally share a wall with your neighbours. That physical connection is why the Party Wall etc. Act 1996 is an absolutely non-negotiable part of extending your home. It’s not red tape designed to slow you down; it’s a legal framework that protects both you and your neighbours from disputes.
Think of it as the official rulebook for any major work. The Act ensures your neighbours are formally told about any plans that might affect their property, whether you’re digging new foundations or cutting into the shared wall to slot in steel beams. This isn't just about being a good neighbour—it’s a legal must-do.
These shared walls are a legacy of the Victorian era, a time of mass construction to house a booming urban population. Today, around 35% of England's terraced homes were built before 1919, creating the close-knit streets and shared structures we manage now. You can dive deeper into the history and layout of English homes in this detailed report.
The Party Wall Notice Process
The whole thing kicks off when you serve a formal Party Wall Notice on every neighbour who might be affected. This document clearly lays out the work you’re planning to do and must be served at least two months before you want to start building.
Once they have the notice, your neighbours have 14 days to respond in one of three ways:
- Consent: They agree to the works in writing. Simple.
- Dissent: They disagree, or they don’t respond at all (which legally counts as a dissent).
- Serve a Counter-Notice: They can ask for reasonable changes, like making the new foundations deeper so they can build their own extension in the future.
If your neighbour dissents, it doesn’t stop your project. It just means it's time to get the professionals involved.
A Party Wall Agreement isn't an obstacle; it's a safety net. It provides a clear, legally binding record of your neighbour's property's condition before work begins, protecting you from false claims of damage and giving them total peace of mind.
What Happens After a Dissent
If a neighbour dissents, you’ll need to appoint a Party Wall Surveyor. Your neighbour can either agree to use the same surveyor as you (this is called an 'Agreed Surveyor') or they can appoint their own. Either way, their surveyor's professional fees are your responsibility.
The surveyors then get to work drafting a Party Wall Award (also called an Agreement). This is a detailed legal document that sets out:
- The exact work to be carried out.
- A Schedule of Condition, which is a photographic and written record of your neighbour’s property before you start.
- Measures to prevent any damage.
- Agreed working hours and access arrangements for the surveyors.
Honestly, a good relationship with your neighbours is worth its weight in gold. While the Act provides a clear legal path, a friendly chat over the fence from the very beginning can make everything go so much more smoothly. Keeping them in the loop about noise, deliveries, and timelines can stop small annoyances from turning into big arguments, saving everyone a lot of time, stress, and money.
To figure out if your project needs a formal agreement, you might find our Party Wall Agreement checker useful.
Budgeting for Your Extension: Costs, Timelines, and Value
A great extension doesn’t start when the first brick is laid; it begins with a solid, realistic financial plan. It's easy to get swept up in the exciting design possibilities, but a firm grasp of the costs, timelines, and potential value is what separates a smooth project from a stressful one. An extension is a big financial commitment, but it’s also one of the smartest investments you can make in a London property.
When thinking about the budget for extensions to terraced houses, you need to look past a simple cost-per-square-metre figure. That number only ever tells part of the story. The total investment is a mix of the build cost and a whole raft of professional fees needed to get your project off the ground legally and safely.
Beyond the Build Costs
The headline figure from your builder is for the construction itself, but several other crucial expenses must be factored in right from the start. Forgetting these can quickly sink your budget.
- Architect and Design Fees: This typically comes in at 5-15% of the total construction cost. This covers everything from initial concepts and detailed technical drawings for builders to handling your planning application.
- Structural Engineer Fees: You'll need an engineer to run the numbers for vital components like steel beams (RSJs) and foundations. Expect to pay between £500 and £2,500, depending on how complex your project is.
- Planning and Building Control Fees: Submitting a planning application to a London council costs a few hundred pounds. You’ll also have fees for building control inspections, which ensure all the work meets legal standards.
- Party Wall Surveyors: If your neighbours don't agree to your Party Wall Notice, you'll be on the hook for the fees of at least one surveyor. This can range from £1,000 to £2,000 per neighbour.
Budgeting for an extension is like booking a long-haul flight. The ticket price (the build cost) is the main expense, but you also need to account for baggage fees, airport transfers, and travel insurance (the professional fees) to see the full picture.
Finally, always, always build a contingency fund of at least 10-15% of your total project cost. This isn’t a sign of bad planning; it's a sensible safety net for the unexpected issues that older terraced properties love to reveal once the work starts. For a more detailed look, you can check out our guide on calculating the cost of a London house extension.
To help you get a clearer picture, here’s a rough guide to what you can expect to spend and how long different types of extensions typically take in London.
| Extension Type | Estimated Build Cost (London) | Professional Fees (Estimate) | Average Project Timeline (Design to Completion) |
|---|---|---|---|
| Side-Return Extension | £50,000 – £75,000+ | £7,000 – £15,000 | 5 – 8 months |
| Rear Extension (3m-6m) | £60,000 – £90,000+ | £8,000 – £18,000 | 6 – 9 months |
| Wrap-Around Extension | £85,000 – £130,000+ | £12,000 – £25,000 | 8 – 12 months |
| Loft Conversion (Dormer) | £55,000 – £80,000+ | £6,000 – £12,000 | 5 – 7 months |
Disclaimer: These figures are estimates for 2024/2025 and can vary based on project complexity, materials, and specific site conditions. They should be used as a starting point for your own detailed budgeting.
These numbers give you a ballpark to work with, but remember that high-end finishes, complex structural work, or unforeseen issues can push costs higher.
Typical Timelines and What to Expect
From the first sketch to the final coat of paint, a terraced house extension is a marathon, not a sprint. Having a realistic timeline helps manage your expectations and keeps stress levels down during the build.
- Design & Planning (2-4 months): This is where you work with your architect to develop the designs. Once submitted, waiting for a decision on your planning application usually takes about eight weeks.
- Technical Design & Tender (1-2 months): Your architect and structural engineer create the super-detailed drawings that builders need to give you accurate quotes. This is when you'll send the project out to tender.
- Construction (3-6 months): The on-site build time varies a lot. A simple side-return might take 12-16 weeks, whereas a more complicated wrap-around could easily take six months or more.
The Real Value of Extending Your Home
An extension does more than just add square footage; it genuinely improves your quality of life while significantly boosting your property's value. In London’s fierce property market, adding a beautifully designed kitchen-diner or an extra bedroom is a proven way to get a substantial return on your investment.
This isn’t just talk; the market data backs it up. Extensions have been a huge driver of value growth in UK terraced houses, especially in London hotspots. In Ealing, for example, terraced homes have seen their value leap by an incredible 369% since 1995, jumping from £140,332 to £658,500.
With the UK home improvement market predicted to grow by almost 50% to £16.67 billion by 2033, single-storey extensions are set to remain one of the most popular and value-adding projects a homeowner can undertake. You can find more insights into the growth of the terraced housing market on residebath.co.uk.
Your Step-by-Step Project Checklist
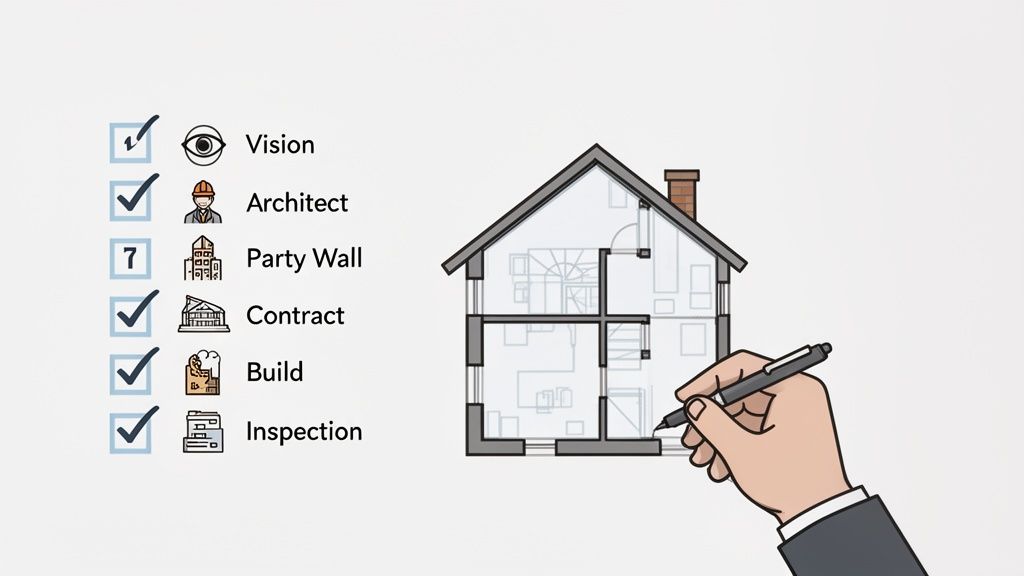
Starting an extension project can feel like a mountain to climb, but if you break it down into a clear, logical sequence, it becomes far more manageable. Think of this checklist as your roadmap, guiding you from that first spark of an idea all the way to popping the kettle on in your finished space.
Following these steps in order is the best way to make sure nothing critical gets missed and that your project doesn't go off the rails. It’s the essential framework that will keep you organised and in control.
Phase One: Ideation and Planning
This first phase is all about turning vague ideas into a solid plan. This is where you lay the groundwork for every decision to come, setting the entire direction for your project.
Define Your Vision and Budget: First things first, get crystal clear on what you actually want to achieve. Are you dreaming of a bigger kitchen, a quiet home office, or an extra bedroom for a growing family? At the same time, you need to work out a realistic budget. Critically, this must include a contingency fund of 10-15% for those inevitable unexpected costs.
Assemble Your Professional Team: You can't do this alone. Your first, and arguably most important, hire is an architect who really understands extensions to terraced houses in London. They'll be your guide through the maze of design and planning. This is also the time to start researching reputable builders.
Phase Two: Design and Approvals
With your core team in place, the focus shifts to nailing down the design and getting all the necessary legal permissions to actually build. This stage demands a lot of patience and meticulous attention to detail.
Finalise Designs and Secure Approvals: Your architect will take your vision and translate it into detailed drawings. They will then steer the submission for either a Lawful Development Certificate (if you're using Permitted Development) or a full Planning Permission application.
Handle Party Wall and Structural Details: While you’re waiting for the council's decision, it’s the perfect time to serve Party Wall Notices to your neighbours. You'll also need to bring a structural engineer on board to produce the calculations and drawings for foundations and steelwork—these are essential for getting Building Regulations approval.
This checklist isn't just a list of jobs to tick off; it's a strategic sequence. Getting each step properly sorted before moving to the next is the single best way to prevent expensive mistakes and frustrating delays down the line.
Phase Three: Construction and Completion
Once all the permissions are in hand, you can finally move into the most exciting phase of the project: the build itself.
Select Your Contractor: Send your detailed drawing package out to at least three builders for quotes. Don't just look at the price—check their references thoroughly, visit past projects, and make sure you sign a formal contract, like a JCT contract, before any work starts.
Navigate the Build Phase: Keep the lines of communication with your builder wide open. Regular site meetings and progress updates are absolutely crucial for keeping the project on schedule and, just as importantly, on budget.
Complete Final Inspections: At the very end of the build, a building control surveyor will carry out a final inspection. Once they’re satisfied that all the work meets the required standards, they will issue a completion certificate. That’s the final piece of paper you need before you can properly enjoy your stunning new space.
Your Questions Answered
Starting an extension on a terraced house always throws up a ton of practical questions. I’ve pulled together the most common ones we get from London homeowners and answered them straight, based on years of doing this stuff on the ground. Hopefully, this will help you know what to expect and feel a bit more in control of the process.
The big one we always hear is: can I stay in the house while the work is happening? Yes, you can, but it comes with some hefty warnings. For a rear or side-return extension, it’s usually doable. Your builders will seal off the work area as best they can to keep the dust and chaos contained.
But let’s be honest, you need to prepare for some serious disruption. You’ll lose your garden for a while, and you’ll almost certainly have a makeshift kitchen set up in the living room for a few weeks. It takes a lot of patience and a pretty relaxed attitude.
How Long Will the Build Actually Take?
Once the builders get started, how long is your life going to be turned upside down? Every project is unique, of course, but a decent rule of thumb for the on-site construction is 12 to 16 weeks for a standard, single-storey rear or side-return extension. A bigger, more complicated wrap-around job could easily stretch beyond six months.
That timeline gets you from the day they break ground to the point where the main structure is built and watertight. After that, the internal fit-out begins – that’s all the electrics, plumbing, plastering, and decorating.
What Problems Do Period Properties Throw Up?
Victorian and Edwardian terraces are gorgeous, but they can hide some nasty surprises. When you start opening up older properties, a few common headaches tend to appear that can mess with your schedule and your budget.
Here’s what to keep an eye out for:
- Shallow Foundations: Loads of older houses were built with foundations that just don’t cut it by today’s standards. This often means you’ll need to underpin them, which isn’t cheap.
- Dodgy Drains: It’s not uncommon to find old clay pipes or drains right where you want to build, forcing you to move them or replace the lot.
- Wonky Walls: Nothing in an old house is ever truly straight. Walls and floors that aren’t perfectly level can make it a real challenge to connect the new extension seamlessly.
Knowing what might go wrong is the best way to handle it when it does. A proper initial survey from your architect and structural engineer, plus a healthy 10-15% contingency fund, is your best defence against unexpected issues throwing your project off track.
Don't let these potential problems put you off. They’re just part of the deal when working with beautiful old homes. A good, experienced team will have seen it all before and will know exactly how to sort it out.
Ready to transform your terraced house with a stunning, high-quality extension? The team at All Well Property Services offers expert design, clear communication, and dependable project management from start to finish. Get your free, no-obligation quote today.