Damp problems affect millions of UK homes, causing structural damage, health issues, and costly repairs that could have been prevented with proper knowledge and action. Whether you’re dealing with musty odours, discoloured walls, or visible mould growth, understanding the root causes and effective solutions is essential for protecting your property and family’s well-being.
Damp is wholly preventable when you understand what causes it and take the right steps to address moisture problems before they escalate. From condensation issues in poorly ventilated bathrooms to rising damp creeping up through foundations, each type of damp requires specific treatment approaches to achieve lasting results.
This comprehensive guide walks you through identifying different types of damp, recognising early warning signs, and implementing proven treatment methods that tackle the source rather than just the symptoms. You’ll discover practical ventilation solutions, effective moisture control techniques, and prevention strategies that keep your home dry and healthy for years to come.
Key Takeaways
- Identifying the specific type of damp is crucial for choosing the most effective treatment method
- Proper ventilation and moisture control prevent most damp problems from developing
- Early intervention saves money and prevents serious structural damage to your property
What Is Damp?
Damp occurs when excess moisture accumulates in your home’s structure, creating conditions that can lead to serious structural damage and health problems. Understanding what damp is and how it affects buildings helps you identify problems early and take appropriate action.
The Definition of Damp
Damp refers to the presence of unwanted moisture within your home’s walls, floors, or ceilings. This moisture can enter through various pathways and manifest in different ways throughout your property.
Three main types of damp affect UK homes:
- Rising damp – Ground moisture travels upward through walls
- Penetrating damp – External water enters through structural defects
- Condensation – Warm, moist air creates water droplets on cold surfaces
Rising damp occurs when moisture from the ground rises through your walls. This typically happens due to a failed damp-proof course or the absence of proper moisture barriers.
Penetrating damp develops when water from outside enters your home. Common causes include damaged roofs, faulty gutters, or cracks in external walls.
Condensation forms when warm, humid air meets cold surfaces like windows or poorly insulated walls. This creates the perfect environment for moisture accumulation.
How Damp Affects Homes
Damp creates significant problems for both your property’s structure and your family’s health. The effects range from cosmetic damage to serious structural issues requiring expensive repairs.
Structural damage occurs when moisture weakens building materials over time. Timber becomes waterlogged and may rot, whilst masonry can deteriorate and lose structural integrity.
Visual damage appears as peeling wallpaper, bubbling paint, and unsightly stains on walls and ceilings. These cosmetic issues often signal deeper moisture problems within your home’s structure.
Mould growth thrives in damp conditions, appearing as dark patches on walls, ceilings, and window frames. Mould can pose serious health risks, particularly for vulnerable individuals, including children, elderly people, and those with respiratory conditions.
The longer damp persists, the more extensive the damage becomes. Early identification and treatment prevent minor moisture issues from developing into major structural problems.
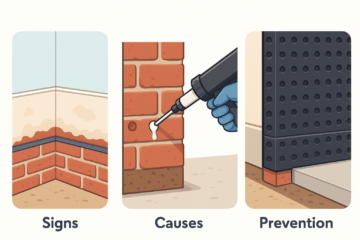
Recognising Signs of Damp
Early detection of dampness prevents costly structural damage and protects your health. Visual indicators like staining and mould growth, combined with musty odours, typically signal moisture problems that require immediate attention.
Common Visual Indicators
Discolouration and Staining
You’ll notice damp stains on walls and ceilings as brown, yellow, or dark patches. These marks often appear as watermarks or tide lines, particularly on lower sections of walls.
Peeling Paint and Wallpaper
Peeling paint occurs when moisture causes the surface to lose adhesion. Wallpaper may bubble, curl at edges, or peel away completely from walls.
Mould Growth
Black mould appears as dark spots or patches, typically in corners or around windows. Other mould types present as green, white, or orange growths on surfaces.
Salt Deposits
White, chalky deposits called efflorescence form when moisture evaporates, leaving mineral salts on brick or stone surfaces. These crystalline formations indicate water penetration through masonry.
Structural Changes
Rotting skirting boards, warped floorboards, and crumbling plaster signal advanced moisture damage. Wooden frames around windows and doors may show signs of decay or distortion.
Associated Health Risks
Respiratory Problems
Mould spores trigger asthma attacks, coughing, and breathing difficulties. People with existing respiratory conditions face increased symptoms in damp environments.
Allergic Reactions
Exposure to mould growth causes skin irritation, runny nose, and watery eyes. Some individuals develop more severe allergic responses to specific mould types.
Immune System Impact
Prolonged exposure to damp conditions weakens your immune system. Children and elderly residents face higher risks of developing health complications.
Sleep Disruption
Musty odours and poor air quality disrupt sleep patterns. Respiratory symptoms often worsen during nighttime hours in damp bedrooms.
Areas Most Commonly Affected
Bathrooms and Kitchens
These high-moisture areas develop condensation problems around windows, walls, and ceilings. Steam from cooking and bathing creates ideal conditions for mould development.
Basements and Cellars
Below-ground areas suffer from rising damp and penetrating moisture. Poor ventilation compounds these problems, creating persistent dampness.
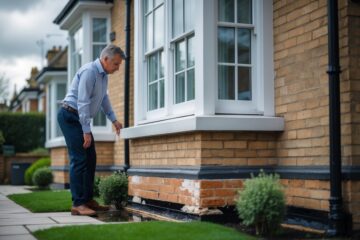
External Walls
North-facing walls receive less sunlight and dry more slowly after rain. Penetrating damp commonly affects these surfaces, causing internal staining.
Window Areas
Condensation forms around window frames, particularly in single-glazed properties. This moisture leads to mould growth on frames and surrounding walls.
Roof Spaces
Leaking roofs cause water damage to ceilings and upper walls. Poor insulation creates condensation problems in loft spaces.
Types of Damp and Their Causes
Three main types of damp affect British homes: rising damp from ground moisture, penetrating damp from external water ingress, and condensation from internal moisture buildup. Each type has distinct causes and requires different identification methods to address effectively.
Rising Damp Explained
Rising damp occurs when groundwater moves upward through building materials by capillary action. This typically affects older properties built before 1875 that lack proper damp-proof courses.
The primary cause is the absence or failure of a damp-proof course (DPC). When no physical barrier exists between the ground and walls, moisture travels upward through porous materials like brick and mortar.
Common contributing factors include:
- Missing or damaged damp-proof membranes
- Garden soil levels above the DPC
- Bridging of the damp-proof course by rendering or debris
- Structural settling that cracks the DPC
Rising damp symptoms include tide marks on walls, peeling paintwork, and salt deposits. The damage typically extends up to one metre from ground level.
Older properties are most vulnerable because they were constructed before modern building regulations required effective moisture barriers.
Understanding Penetrating Damp
Penetrating damp results from water entering buildings through external defects in walls, roofs, or windows. Unlike rising damp, this moisture moves horizontally through building fabric.
Primary causes include:
- Damaged roof tiles or flashing
- Blocked or overflowing gutters
- Cracked exterior walls or pointing
- Faulty window seals
- Leaking internal pipework
Penetrating damp appears as brown stains on walls and ceilings, often near chimney breasts or external walls. The patches typically worsen during heavy rainfall.
Poor maintenance is the leading factor in penetrating damp problems. Regular inspection of rooflines, guttering, and external walls prevents most issues.
This type of damp can occur at any height within a building, distinguishing it from rising damp’s ground-level patterns.
Condensation: The Most Frequent Issue
Condensation forms when warm, moist air contacts cold surfaces, creating water droplets. This is the most common damp problem in modern homes due to lifestyle factors and improved insulation.
Key causes include:
- Inadequate ventilation in kitchens and bathrooms
- Temperature differences between indoor and outdoor air
- High moisture activities like cooking and bathing
- Poor heating patterns
Condensation symptoms include water droplets on windows, dark mould around openings, and streaming walls. The problem worsens during winter months when heating creates greater temperature differentials.
Modern homes trap moisture more effectively due to double glazing and insulation improvements. Without adequate ventilation, this moisture has nowhere to escape.
High-risk areas include:
- Bathrooms without extractor fans
- Kitchens with poor ventilation
- Bedrooms with external walls
- Properties with intermittent heating
The problem often develops gradually, making early identification crucial for preventing extensive mould growth and structural damage.
The Role of Mould in Damp Problems
Mould develops when moisture levels remain elevated in your home, creating the perfect breeding ground for spores to multiply. Damp and mould issues can seriously impact both your property and health if left untreated.
Conditions for Mould Growth
Mould requires three essential elements to flourish in your home: moisture, warmth, and organic material to feed on. The most common temperature range for mould growth is between 20-25°C, which matches typical indoor temperatures.
Moisture Sources:
- Cooking steam and washing activities
- Poor ventilation systems
- Leaking pipes or roofs
- Rising damp from foundations
Your home’s relative humidity levels should stay below 60% to prevent mould formation. When humidity exceeds 70%, mould spores become active and begin colonising surfaces.
Black mould thrives particularly well on organic materials like wood, paper, and fabric. It can appear within 24-48 hours of water damage occurring. Areas with poor air circulation, such as corners and behind furniture, create ideal conditions for mould growth.
High-Risk Locations:
- Bathrooms and kitchens
- Basements and cellars
- Window frames and sills
- Wardrobes against external walls
Health Issues Linked to Mould
Mould exposure can trigger various health problems, particularly affecting your respiratory system. Health conditions can worsen when mould remains untreated in your living environment.
Common Symptoms:
- Persistent coughing and sneezing
- Throat irritation and hoarseness
- Skin rashes and eczema flare-ups
- Eye irritation and watering
People with asthma face increased risks from mould exposure. Spores can trigger severe asthma attacks and worsen existing breathing difficulties.
Children and elderly individuals are particularly vulnerable to mould-related health issues. Their immune systems may struggle more with fungal exposure.
Serious Health Concerns:
- Allergic reactions and sensitivities
- Respiratory infections
- Chronic fatigue symptoms
- Headaches and concentration problems
Black mould produces mycotoxins, which are toxic compounds that can cause more severe health effects with prolonged exposure.
Identifying the Source of Moisture
Moisture enters homes through three primary routes: water penetration through walls, everyday household activities, and condensation on cold surfaces. Understanding these sources helps you target the root cause rather than treating symptoms.
Spotting Damp in Walls
Wall dampness typically manifests through visible signs that indicate underlying moisture problems. Look for dark patches, discolouration, or water stains on interior walls, particularly near ground level or around windows.
Rising damp creates a tide mark effect up to one metre from floor level. You’ll notice salt deposits, peeling wallpaper, or crumbling plaster at the base of walls.
Penetrating damp appears as patches that worsen during rainfall. Check exterior walls for:
- Cracked pointing or mortar
- Damaged roof tiles or guttering
- Blocked drainage systems
- Faulty window seals
Wallpaper may bubble or peel away from affected areas. Paint often flakes or develops a powdery texture where moisture has penetrated.
Use a moisture meter to confirm dampness levels in suspect areas. Professional surveyors recommend that readings above 20% indicate significant moisture problems requiring immediate attention from qualified specialists.
Household Activities That Cause Damp
Daily activities generate substantial moisture that contributes to indoor dampness. Cooking releases steam and water vapour into the air, particularly when boiling, steaming, or using dishwashers without proper ventilation.
Kitchen activities produce the most moisture:
- Boiling water creates up to 2 litres of steam per hour
- Dishwashers release hot, humid air when opened
- Cooking without extractor fans traps moisture indoors
Showering and bathing generate large amounts of water vapour. A typical 10-minute shower produces approximately 1.5 litres of moisture.
Clothes drying indoors adds significant humidity. Wet laundry can release up to 5 litres of water vapour into your home’s atmosphere.
Other moisture sources include:
- Houseplants release water through transpiration
- Unvented tumble dryers
- Aquariums and fish tanks
- Breathing and perspiration from occupants
Reducing moisture from daily activities requires proper ventilation and modified habits.
Recognising Cold Surfaces
Cold surfaces attract moisture through condensation when warm, humid air meets cooler materials. This process occurs naturally when temperature differences exist within your home.
Common cold surface locations:
- Single-glazed windows and frames
- Exterior walls, particularly north-facing ones
- Uninsulated areas around thermal bridges
- Cold water pipes and cisterns
Condensation appears as water droplets on windows, mirrors, and metal surfaces. You’ll notice this most prominently during winter months when heating creates temperature contrasts.
Thermal bridges occur where insulation gaps allow cold to penetrate. These areas become condensation hotspots, often leading to mould growth.
Metal window frames conduct cold efficiently, making them prone to condensation. The same applies to concrete lintels and structural elements that extend through insulation layers.
Cold surfaces below the dew point temperature will always attract moisture from humid air. Improving insulation and maintaining consistent temperatures reduces this risk significantly.
Effective Damp Treatment Methods
Once you’ve identified the type of damp affecting your property, swift action prevents further damage and health risks. Proper treatment requires removing contamination, repairing structural damage, and knowing when professional intervention becomes necessary.
Removing Mould Safely
Black mould poses serious health risks and requires careful removal techniques. Never attempt to clean large areas of mould without proper protection.
For small patches under 1m², you can tackle the problem yourself. Wear protective equipment, including rubber gloves, goggles, and a face mask rated N95 or higher.
Essential cleaning supplies:
- White vinegar or specialised mould remover
- Stiff brush or cloth
- Plastic sheeting to contain spores
- Bin bags for contaminated materials
Mix one part white vinegar with one part water for an effective natural solution. Spray the affected area and leave for one hour before scrubbing gently.
Never use bleach on porous surfaces as it only removes surface staining whilst leaving root systems intact. Bleach can actually feed certain mould species.
Dispose of contaminated materials immediately in sealed bags. Vacuum the area with a HEPA filter afterwards and ensure proper ventilation during cleaning.
If mould returns within days, the underlying damp source hasn’t been addressed and professional assessment is needed.
Repairing Damage from Damp
Structural damage from damp requires systematic repair once moisture sources are eliminated. Attempting repairs whilst damp persists will result in recurring problems.
Allow affected areas to dry completely before beginning repairs. This process can take several weeks, depending on the severity and materials involved.
Common repair requirements:
- Replastering walls with lime-based mortars
- Replacing damaged timber elements
- Repointing brickwork
- Installing new skirting boards
- Replacing insulation materials
Salt-contaminated plaster must be completely removed and replaced. These hygroscopic salts will continue attracting moisture even after the original damp source is resolved.
Use breathable materials during restoration to prevent trapping residual moisture. Modern cement-based renders can worsen damp problems in older properties.
Timber damage often extends beyond visible areas. Professional assessment determines whether treatment or replacement is necessary for structural elements.
When to Seek Professional Help
Certain damp situations require professional damp proofing specialists to ensure effective treatment and prevent recurring issues.
Contact professionals immediately for:
- Mould coverage exceeding 1m²
- Structural timber showing signs of rot
- Persistent damp despite DIY attempts
- Multiple rooms affected simultaneously
- Properties lacking damp proof courses
Rising damp treatment often requires chemical injection or membrane systems that need specialist equipment and expertise.
Professional assessment includes:
- Moisture meter readings
- Identification of damp sources
- Structural damage evaluation
- Treatment method recommendations
- Written guarantees for work completed
Severe or persistent damp problems can indicate underlying building defects that require comprehensive solutions beyond surface treatments.
Insurance claims for damp damage typically require professional reports and certified remediation work. Attempting DIY repairs may invalidate coverage.
Ventilation and Reducing Condensation
Proper ventilation removes moisture-laden air whilst introducing fresh, dry air to prevent condensation from forming on cold surfaces. Dehumidifiers and extractor fans work alongside natural ventilation to maintain optimal humidity levels throughout your home.
Importance of Good Ventilation
Effective ventilation serves as the primary defence against condensation by maintaining balanced air circulation throughout your property. Without adequate airflow, moisture from cooking, washing, and breathing accumulates in your home’s air.
Modern energy-efficient homes with double glazing and insulation can inadvertently trap moisture indoors. This creates ideal conditions for condensation to form on windows, walls, and other cold surfaces.
Natural ventilation through open windows allows cross-ventilation that removes stale, humid air. Opening windows on opposite sides of your home creates airflow that carries moisture outside.
Mechanical ventilation systems provide consistent air exchange when natural methods prove insufficient. These systems include:
- Positive Input Ventilation (PIV) – draws fresh air from outside
- Mechanical Extract Ventilation (MEV) – removes moisture from wet rooms
- Heat Recovery Ventilation – maintains warmth whilst exchanging air
Background ventilation through trickle vents maintains continuous airflow even when windows remain closed. These small vents prevent excessive moisture buildup without creating draughts.
Using Extractor Fans
Extractor fans target moisture at its source by removing humid air from bathrooms, kitchens, and utility rooms before it spreads throughout your home. Installing fans in these wet rooms prevents condensation from forming elsewhere.
Bathroom extractor fans should run during and after showers or baths. Leave the fan running for 15-20 minutes after bathing to remove residual moisture from the air.
Kitchen extractor fans remove steam from cooking activities. Use the fan whenever boiling water, using the dishwasher, or cooking foods that generate steam.
Modern extractor fans include humidity sensors that automatically activate when moisture levels rise. These intelligent systems eliminate the need for manual operation whilst ensuring optimal performance.
| Fan Type | Best Location | Running Time |
|---|---|---|
| Bathroom | Above shower/bath | 15-20 minutes after use |
| Kitchen | Above hob | During and 10 minutes after cooking |
| Utility Room | Near washing machine | During and after washing cycles |
Intermittent extraction fans provide powerful moisture removal during peak usage periods. Continuous extraction fans maintain constant low-level ventilation throughout the day.
Benefits of Dehumidifiers
Dehumidifiers extract excess moisture directly from room air, reducing humidity levels below the point where condensation forms. These appliances prove particularly effective in rooms with limited ventilation options.
Portable dehumidifiers offer flexibility to target specific problem areas. Move these units between rooms as needed, focusing on areas where condensation appears most frequently.
Whole-house dehumidifiers integrate with your heating system to control humidity throughout your entire property. These systems provide consistent moisture control without requiring daily attention.
Modern dehumidifiers feature built-in humidistats that automatically maintain your desired humidity level. Set the target humidity between 40-60% for optimal comfort and condensation prevention.
Desiccant dehumidifiers work effectively in colder conditions where traditional compressor models lose efficiency. These units prove ideal for unheated spaces like garages or basements.
Refrigerant dehumidifiers excel in warmer rooms and offer energy-efficient operation. They collect moisture in removable tanks or drain continuously through hose connections.
Regular maintenance includes emptying water tanks, cleaning filters, and checking drain connections to ensure optimal performance.
Preventing Damp for Good
Effective damp prevention requires a three-pronged approach: regular maintenance to catch problems early, proper damp-proofing solutions to create barriers against moisture, and protective treatments for walls and surfaces.
Routine Maintenance and Inspections
Schedule monthly checks of your property’s exterior during autumn and winter months. Inspect gutters, roofs, and external walls for damage or leaks to prevent water ingress.
Key inspection points:
- Clean gutters and downpipes every three months
- Check roof tiles for cracks or displacement
- Examine window seals and door frames for gaps
- Look for cracked mortar joints or damaged brickwork
Monitor indoor humidity levels using a hygrometer. Keep readings between 40-60% to prevent condensation forming on cold surfaces.
Check your home’s ventilation system monthly. Ensure extractor fans work properly and replace filters as needed. Clear any blocked air vents or trickle vents in window frames.
Inspect areas prone to dampness weekly, including basements, bathrooms, and kitchens. Look for early warning signs like musty odours, water stains, or peeling wallpaper.
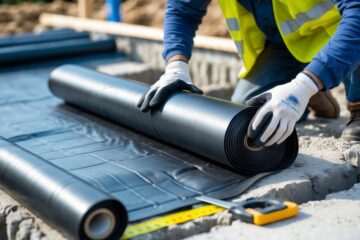
Damp-Proofing Solutions
Install or upgrade your damp-proof course (DPC) if you notice rising damp symptoms. Modern chemical injection systems create effective barriers against groundwater penetration through walls.
Essential damp-proofing measures:
- Apply waterproof coatings to external walls
- Install cavity wall insulation correctly
- Fit membrane barriers in basements
- Use damp-proof membranes under the ground floors
Improve your home’s drainage system to direct water away from foundations. Ensure ground levels slope away from walls and consider installing French drains in problem areas.
Upgrade ventilation systems in high-moisture areas. Install mechanical ventilation with heat recovery (MVHR) systems for whole-house air circulation.
Apply tanking systems to below-ground rooms like cellars. These waterproof membranes prevent moisture penetration through walls and floors.
Protecting Walls and Surfaces
Treat walls with breathable waterproof sealants that repel moisture whilst allowing walls to breathe naturally. These products prevent penetrating damp without trapping existing moisture inside.
Wall protection options:
- Lime-based renders for older properties
- Waterproof masonry paints for external walls
- Anti-condensation paints for internal surfaces
- Damp-resistant plaster systems
Use appropriate insulation materials that won’t compromise your walls’ ability to manage moisture. Avoid impermeable materials that can trap dampness behind them.
Apply protective coatings to vulnerable areas like window sills, door frames, and joints between different materials. Regular reapplication maintains their effectiveness.
Consider specialist treatments for different wall types – solid walls need different approaches than cavity walls or timber frame construction.
Replace damaged pointing and mortar joints promptly. Use appropriate mortar mixes that match your building’s age and construction methods.
Frequently Asked Questions
Property owners often face confusion about selecting the right damp treatments and understanding proper installation techniques. These common questions address specific product choices, application methods, and effective strategies for different damp scenarios.
What are the most effective internal treatments for damp walls?
Chemical damp-proof courses provide the most reliable solution for rising damp issues. You inject damp-proof cream through drilled holes into mortar joints to create a waterproof barrier that prevents moisture from rising above the treatment level.
For condensation problems, you should use fungicidal mould wash followed by anti-mould paint. This combination tackles existing mould growth whilst preventing future outbreaks.
Tanking systems work effectively for basement walls exposed to ground moisture. These involve applying waterproof membranes or coatings to internal wall surfaces.
Salt neutralising solutions address hygroscopic salts that continue drawing moisture from the air. You apply these treatments before any decorative finishes to prevent ongoing dampness.
Which damp proofing products offer the best results for walls?
Microshield Ultra water repellents deliver excellent protection for external masonry against penetrating damp. These products penetrate deeply into substrates whilst allowing walls to breathe naturally.
Chemical damp-proof creams containing silicone or silane provide proven results for rising damp treatment. They create horizontal barriers that remain effective for decades when properly installed.
Cavity drain membranes offer superior performance for below-ground waterproofing. These systems manage water ingress whilst maintaining dry internal environments.
Anti-mould paints containing biocides prevent mould growth on internal surfaces. Choose products specifically formulated for high-humidity environments like bathrooms and kitchens.
How can you damp proof external walls to prevent moisture ingress?
Apply penetrating water repellents to external masonry surfaces using brush, roller, or spray equipment. These treatments require dry conditions and temperatures above 5°C for proper curing.
Install cavity trays above openings and at roof abutments to redirect water away from vulnerable areas. Ensure proper overlap and seal all joints with compatible sealants.
Repair pointing defects using appropriate mortar mixes that match existing materials. Remove loose mortar to adequate depth before applying new pointing.
Check and maintain guttering systems regularly to prevent overflow and splash-back against walls. Clear blockages promptly and repair damaged sections.
What are the advantages of using damp proof paint on interior surfaces?
Damp proof paints provide immediate protection against moisture penetration through internal walls. They create vapour barriers that prevent condensation from forming on cold surfaces.
These products offer cost-effective solutions for minor damp issues without requiring invasive treatments. You can apply them directly over existing decorations in many cases.
Modern formulations include anti-mould additives that prevent fungal growth on treated surfaces. This reduces health risks and maintains appearance over time.
Damp proof paints dry quickly and remain flexible to accommodate minor structural movement. They provide durable finishes that resist peeling and flaking.
How does one properly install a damp proof membrane on external walls?
Excavate around the wall to expose the full height requiring treatment. Remove all soil, debris, and loose materials from the wall surface.
Clean the wall thoroughly using wire brushes or pressure washing to ensure proper adhesion. Allow adequate drying time before membrane application.
Apply primer coats where specified by manufacturers to enhance bonding. Follow recommended coverage rates and drying times between coats.
Install membranes from bottom to top with minimum 150mm overlaps at all joints. Seal laps using compatible adhesives or welding techniques as appropriate.
Protect completed installations with drainage boards or protective sheeting. Backfill carefully using free-draining materials to prevent membrane damage.
What are proven strategies for eradicating damp in domestic settings?
Identify the specific damp type affecting your property before selecting treatments. Condensation, penetrating damp, and rising damp require different approaches for effective resolution.
Address the underlying causes rather than treating symptoms alone. Repair structural defects, improve ventilation, or install physical barriers as appropriate.
Implement comprehensive moisture management strategies, including controlled ventilation systems. Humidity-controlled extractor fans and whole-house ventilation prevent condensation effectively.
Monitor indoor humidity levels using hygrometers and maintain levels between 40-60% relative humidity. This prevents both condensation and dust mite proliferation.
Schedule regular maintenance checks for gutters, roofing, and external seals. Early detection prevents minor issues from developing into major damp problems.