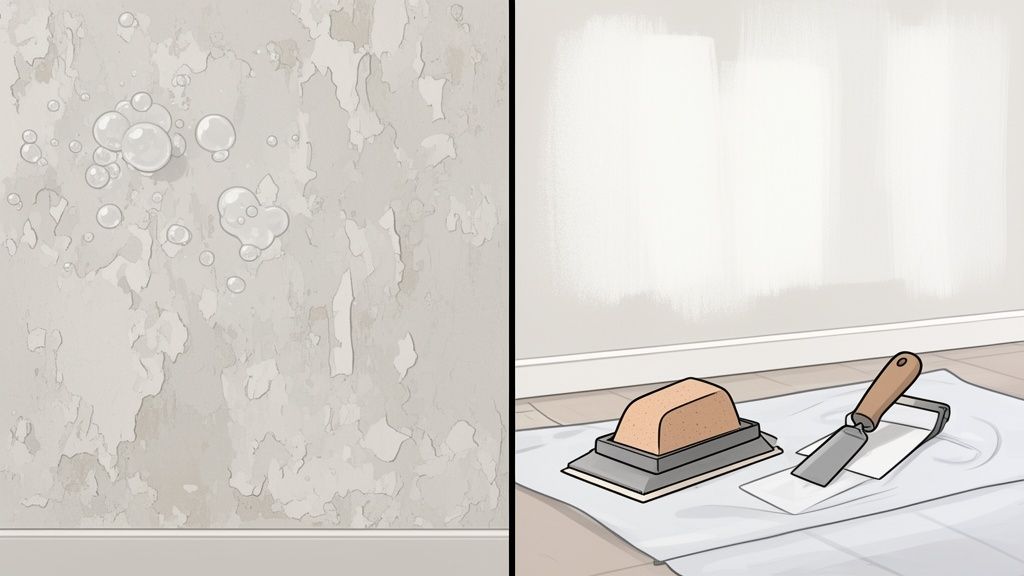
Ever wonder what separates a professional-looking paint job from one that starts bubbling and peeling within a year? It’s not the paint. It’s the prep work. Meticulous preparation is the unsung hero of a lasting finish, ensuring your new colour goes on smoothly and stays put.
Why Wall Preparation Is the Secret to a Perfect Paint Job
Most people get caught up in choosing the perfect colour, but any seasoned decorator will tell you the real work happens long before a roller even sees the paint tray. Think of it like an artist preparing a canvas; a flawed, dirty surface guarantees a flawed result, no matter how premium the paint is.
Skipping these crucial steps is a classic false economy. You might save a few hours upfront, but you’ll pay for it later when the paint flakes off, old stains bleed through, and every little imperfection is magnified by the new finish. A properly prepared wall doesn't just look better—it performs better, resisting the daily grind for years to come.
The True Cost of Cutting Corners
The fallout from poor prep is huge, not just for homeowners but for the entire industry. Statistics show that unclean or badly prepped surfaces are responsible for an estimated 40% of all paint failures in residential jobs. This simple oversight can drive up the total cost of a project by an average of 25%, thanks to the need for premature repairs and repainting.
In an industry already facing a skills shortage, getting every project right the first time has never been more critical. You can learn more about the current trends in the UK painting industry and see exactly why the pros are so obsessed with prep.
Adopting a professional mindset means seeing preparation as the most important investment you'll make in your entire decorating project. This guide is here to walk you through that process, step-by-step, to make sure your hard work pays off with a finish you can be proud of.
The quality of your paint finish is determined by the quality of your preparation. Time spent cleaning, filling, and sanding is never wasted—it's the investment that protects the final result and ensures it stands the test of time.
Your Practical Guide to Prepping Any Wall Surface
The journey to a flawless paint finish starts right here, with the hands-on, practical steps that turn a tired wall into the perfect canvas. Forget generic advice. Every room throws a unique challenge at you, from greasy kitchen walls to a living room ceiling yellowed by years of smoke. Good prep isn't about following a rigid formula; it’s about adapting your approach to what the surface demands.
This guide moves beyond theory and gets stuck into the real world. We'll cover the essentials of inspecting, cleaning, repairing, and sanding, giving you the professional techniques needed for a durable, beautiful result.
Start with a Thorough Inspection and Clean
Before you even think about picking up a filler knife or sandpaper, give your walls a proper clean. Paint simply won’t stick to grease, grime, or dust. This isn't just a quick wipe-down; it's a critical first step that directly impacts how long your paint job will last.
For most rooms, a simple solution of sugar soap and warm water applied with a large sponge does the trick perfectly. Work from the top down in manageable sections, rinsing with a separate sponge and clean water as you go. This stops dirty streaks from running down onto areas you've already cleaned.
But what about the more challenging spots?
- Greasy Kitchen Walls: Kitchens are notorious for airborne cooking oils that form a sticky, invisible film. A standard clean often won’t cut it. You'll need a degreasing cleaner or a stronger sugar soap solution to break through that residue.
- Nicotine or Smoke Stains: If you're dealing with walls stained by smoke, cleaning alone won't solve it. After a thorough wash, you will absolutely need a stain-blocking primer to stop the yellow or brown from bleeding through your new paint colour.
- Bathroom Mildew: In humid spots like bathrooms, you might find small patches of mildew. Hit these with a dedicated mould and mildew remover or a diluted bleach solution (always with good ventilation) before the main clean.
Let the walls dry completely, which usually takes a few hours. This is the perfect time to get on with the next phase: repairs.
Repairing Imperfections for a Seamless Finish
Once clean and dry, your walls will show you every single flaw. Now is the time to tackle any cracks, holes, and dents. You can only get a smooth topcoat on a smooth surface, and even the best paint will highlight—not hide—imperfections.
First, deal with any old wallpaper residue. If you've just stripped a room, you might be left with stubborn patches of adhesive. If you need some pointers, our article on how to strip wallpaper effectively gives you a complete walkthrough.
For holes and cracks, the right filler is key.
- Hairline Cracks: These tiny cracks often pop up around door frames or near corners as a house settles. Use a flexible decorator's caulk. Apply a thin bead and smooth it with a wet finger for a seamless join that can handle minor movement.
- Small Nail Holes and Dents: A lightweight spackling compound is ideal. Use a putty knife to press the filler into the hole, leaving it slightly proud of the surface.
- Larger Holes in Plasterboard: For holes bigger than a fifty-pence piece, you’ll need more support. A self-adhesive mesh patch provides a stable base. Just apply the patch over the hole and skim a layer of filler over it, feathering the edges outwards.
Pro Tip: When filling, always apply slightly more than you think you need. Filler shrinks as it dries, and it's far easier to sand down a slightly raised patch than it is to realise you need to apply a second coat later on.
After the filler has dried completely (check the manufacturer's instructions, this could be anything from 30 minutes to several hours), you're ready for the most transformative step: sanding.
The Art of Sanding for a Glass-Smooth Surface
Sanding is the final, critical touch that erases all your repair work and creates a uniformly smooth surface for the paint to grip onto. This step is non-negotiable for a professional look. In fact, industry data shows that proper sanding can reduce paint adhesion failures by as much as 65%.
The secret is to use progressive grits. Start with a medium-grit sandpaper (120-grit) to level out your filled patches and knock back any significant bumps. Work in a gentle, circular motion, being careful not to press too hard, which can create dips in the wall. The goal is to make the filled areas feel completely flush with the surrounding wall when you run your hand over them.
Next, switch to a fine-grit sandpaper (180 or 220-grit) and go over the entire wall. This process, known as "keying" the surface, lightly scuffs up the existing paint. It creates a microscopic texture that helps the new primer and paint adhere tenaciously, and it’s especially important on walls with a slight sheen, like silk or satin finishes. This progressive sanding approach is proven to remove over 90% of the surface imperfections that would otherwise show through the final coat.
Final Dust Control Before Priming
Sanding creates a phenomenal amount of fine dust—the absolute enemy of a smooth paint job. Getting this under control is paramount.
- Seal the Room: Close doors and stuff old towels in the gaps at the bottom. If you can, seal the doorway with plastic sheeting and a zip.
- Use Dust-Extraction: If you're using an electric sander, connect it to a workshop vacuum. This captures the vast majority of dust right at the source.
- Wipe Down Everything: After sanding, vacuum the walls with a soft brush attachment. Then, use a slightly damp microfibre cloth or a tack cloth to wipe every square inch of the walls, skirting boards, and window sills.
Give the dust about 15-20 minutes to settle, then do one last wipe. Your wall is now perfectly cleaned, repaired, and smoothed. You’ve created an ideal canvas, fully prepared and ready for the crucial step of priming.
Handling Different Wall Types and Common Problems
A freshly plastered wall in a new build is a completely different beast to the lime plaster in a Victorian terrace. Properly preparing walls for painting means knowing that each surface has its own personality, and you’ve got to treat it right. Using the wrong technique isn't just a waste of time; it can lead to peeling paint or even damage the wall itself.
Getting your prep strategy right is what separates a DIY job from a professional-quality finish. It’s what makes the paint stick properly, look even, and respect the character of your home. From modern plasterboard to historic brickwork, I'll walk you through the specific steps you need to take.
This visual guide neatly sums up the core process into three stages: clean, fill, and sand.
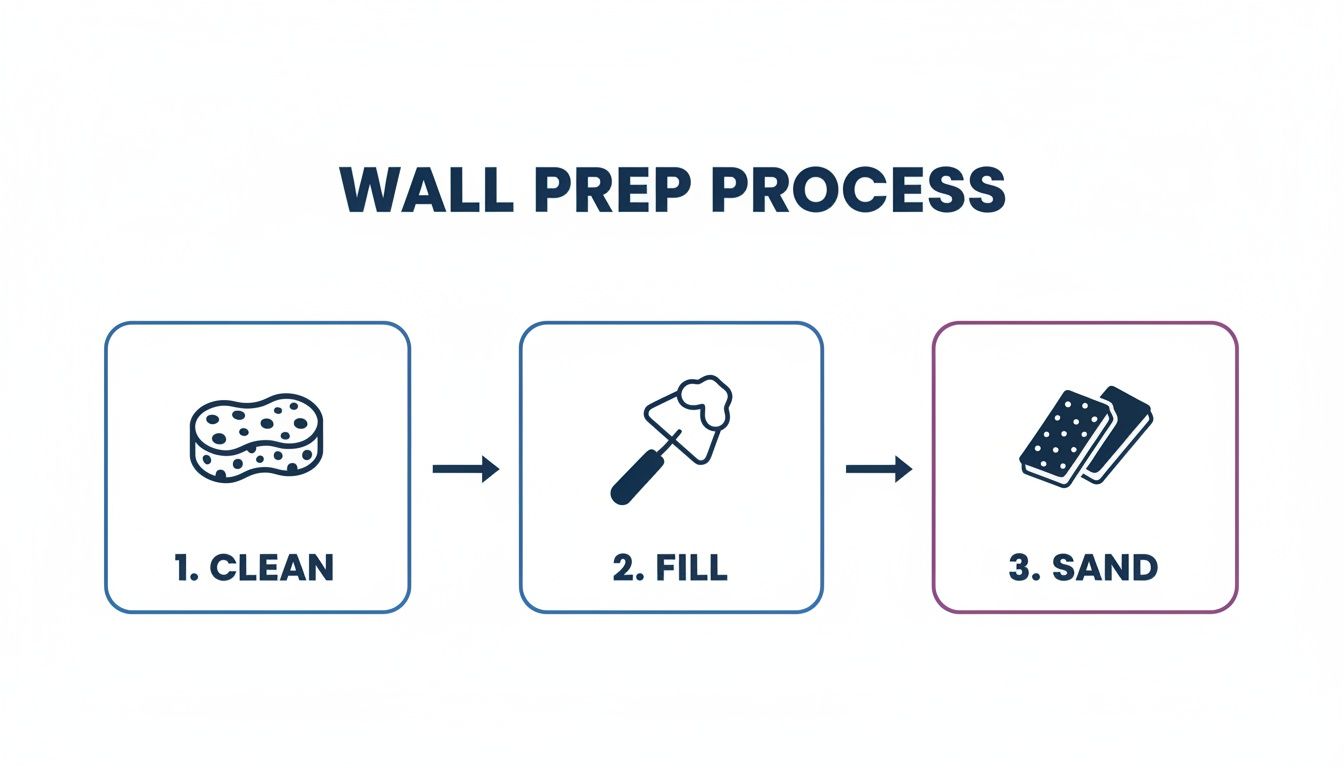
It’s a simple workflow, but it shows how a flawless finish is built on careful, deliberate actions, with each one setting the stage for the next.
To make things even clearer, here’s a quick table breaking down the essentials for each common wall type you’re likely to encounter.
Surface Preparation at a Glance
This table gives you a snapshot of what to expect with different wall materials, from the main challenge you'll face to the type of product that will get the job done right.
| Wall Surface | Key Preparation Step | Common Challenge | Recommended Product Type |
|---|---|---|---|
| Plasterboard/New Plaster | Applying a mist coat | High absorbency (thirst) | Water-based emulsion (thinned) |
| Lime Plaster (Heritage) | Using breathable filler | Trapping moisture, cracking | Lime-based or heritage filler |
| Previously Painted (Matt) | Thorough cleaning | Surface dirt and grime | Sugar soap or TSP substitute |
| Previously Painted (Silk/Gloss) | Sanding to create a 'key' | Poor paint adhesion | Medium-grit sandpaper (120-grit) |
| Exposed Brickwork | Brushing and sealing | Dust, crumbling mortar | Stabilising primer or brick sealant |
Think of this as your cheat sheet. Knowing the basics before you start will save you a lot of headaches later on. Now, let's dive into the details for each one.
Tackling Fresh Plaster and Plasterboard
New plaster is incredibly thirsty. If you slap a standard emulsion straight onto a bare wall, the plaster will suck the water out of the paint far too quickly. This stops the paint from curing properly, which is why you see cracking and peeling a few months down the line.
To stop this from happening, you absolutely must apply a mist coat. A mist coat is just a watered-down version of a standard water-based emulsion—never use vinyl silk or anything with a sheen. The go-to ratio is around 70% paint to 30% water, but always have a quick look at the paint tin for the manufacturer’s advice.
This thinned-down paint seals the porous surface without creating a plastic-like skin, allowing the new plaster to breathe and finish curing. It gives your topcoats the perfect, stable base they need to grab onto.
Key Takeaway: Applying a mist coat is a non-negotiable step for any new plaster or plasterboard. It sorts out the high absorbency of the surface, making sure your final paint coats stick properly and last for years.
Working with Traditional Lime Plaster
If you're in an older property, especially one built before the 1930s, chances are your walls are finished with lime plaster. Unlike modern gypsum, lime is soft, breathable, and a bit flexible. It was designed to manage moisture by letting it pass through the wall and evaporate away.
Using modern, rigid materials like a standard polyfilla or acrylic caulk on lime plaster is a recipe for disaster. These products are much harder than the lime around them and, crucially, they trap moisture. As the building naturally shifts and breathes, these inflexible patches will crack and can even push the original plaster away from the wall.
For any repairs, you have to use sympathetic materials:
- Lime-based fillers: These are specifically designed to work with traditional plasters, matching their softness and breathability.
- Fine surface fillers: For minor cracks, look for products that are clearly labelled as suitable for heritage properties or lime-based surfaces.
Respecting the original materials is vital to keeping an older building healthy. It stops moisture from getting trapped, which can lead to much bigger damp problems. If you want to get into the nitty-gritty of this, you can learn more about how we tackle damp problems in period properties.
Prepping Previously Painted Surfaces
Painting over an old coat of paint sounds easy, but there are a few traps to avoid. The biggest challenge is getting the new paint to stick, especially if the current finish has any kind of sheen.
If your walls are painted with a bog-standard matt emulsion and are in good nick, a thorough clean might be all you need before you get the roller out. However, for silk, satin, or gloss finishes, you have to create a "key" for the new paint to grip onto.
Just take a piece of medium-grit sandpaper—120-grit is usually perfect—and give the entire surface a light scuff. You’re not trying to strip the old paint off, just knock back the shine and create a slightly rough texture. Once you’re done, wipe the walls down with a damp cloth to get rid of every last bit of dust. It's a simple step, but it makes a massive difference in how well your new paint will bond.
Choosing the Right Primer for a Durable Finish
Think of primer as the essential bridge between your carefully prepped wall and that final, perfect paint colour. After all the effort you've put into repairs and cleaning, skipping the primer is one of the biggest mistakes you can make. It's the non-negotiable step that ensures your topcoat looks even, sticks properly, and actually lasts.
Primer does a few critical jobs all at once. It seals porous surfaces so they don't drink up your expensive paint, it stops old stains from bleeding through, and it creates a uniform base. Without it, you’re honestly just rolling the dice on how the final finish will turn out.
Understanding Different Primer Types
Not all primers are created equal, and grabbing the wrong one can cause more headaches than it solves. The three main types—water-based, oil-based, and shellac-based—each have specific strengths for different situations. Picking the right one is fundamental to getting the job done properly.
Here’s a simple breakdown of when to use each:
- Water-Based (Latex) Primers: These are the versatile workhorses for most interior walls. They’re low in VOCs (Volatile Organic Compounds), dry quickly, and clean up easily with soap and water. Perfect for bare plasterboard or for painting over existing water-based paints.
- Oil-Based (Alkyd) Primers: These are your go-to problem solvers. They are absolutely brilliant at blocking stubborn stains like water marks, nicotine, and permanent marker. They also seal porous wood, like skirting boards or window sills, stopping tannins from bleeding through the topcoat.
- Shellac-Based Primers: When you’re up against the toughest stains, shellac is the ultimate weapon. It’s fantastic for sealing in heavy smoke damage, severe water stains, and even persistent odours. It dries incredibly fast but has a very strong smell, so you'll need excellent ventilation.
Using the right product for the job makes all the difference. Slapping a standard water-based primer over a dark water stain, for instance, is a complete waste of time—the stain will just laugh and bleed straight through once the topcoat is dry.
When Is a Primer Absolutely Necessary?
It can be tempting to reach for a "paint and primer in one" product, but these are no substitute for a dedicated primer in certain scenarios. A real primer is formulated for adhesion and sealing; a combination product is essentially just a thicker paint.
You absolutely must use a separate, dedicated primer in these situations:
- On Bare Surfaces: New plasterboard, bare wood, or freshly skimmed plaster are all highly porous. A primer seals these surfaces so your topcoat doesn't get absorbed unevenly, which is what causes a patchy, unprofessional finish.
- Covering Stains: As mentioned, things like water marks, smoke, crayon, or ink will bleed through standard emulsion. A quality stain-blocking primer creates a permanent barrier that hides them for good.
- Making a Dramatic Colour Change: Painting a light colour over a dark one, like going from a deep red to a soft beige, is a real challenge. A tinted grey primer will neutralise the old, bold colour, meaning you'll need far fewer coats of your expensive new paint to get full, even coverage.
A dedicated primer isn't just an extra coat of paint; it's a specialised foundation coat. Its job is to solve surface problems and ensure the final paint looks uniform and adheres permanently. Neglecting it often means having to repaint much sooner than you planned.
Primer Application Tips for a Professional Result
Applying primer is a lot like painting, but your goal is solid coverage, not a flawless finish. Use a roller for the large areas and a brush for cutting in around the edges. Don't worry if it looks a bit patchy or transparent; its main job is to seal the surface and create a bond for the paint.
Always check the manufacturer’s instructions for drying times, as this can vary hugely between types. Oil-based and shellac primers often have much longer "re-coat" times than their water-based cousins. Rushing this step is a classic mistake that can cause your expensive topcoat to bubble or peel right off.
So, how do you know if you need a second coat of primer? If you’re covering a particularly dark colour or a very stubborn stain, a second coat is a wise investment. Once the first coat is dry, take a look. If you can still clearly see the old colour or the stain grinning through, another layer of primer will save you time, effort, and paint later on. It’s a small extra step that ensures a truly flawless result.
Working Cleanly and Safely Like a Professional
A genuinely professional finish isn't just about the sharp lines and smooth surface you see at the end. It's about how you get there. A clean, safe worksite protects your health and stops the rest of your home from being coated in a fine layer of dust.
This is the part of the job people often rush, but believe me, it’s what separates a stressful, messy project from a controlled, professional one.
Thinking about health and safety right from the start is non-negotiable. Many primers, cleaners, and especially older paints contain chemicals you really don't want to be breathing in. Your first line of defence? Proper ventilation.
Open windows at opposite ends of the room to get a good cross-breeze going. If you can't manage that, a simple box fan in a window, pointing outwards, does a surprisingly good job of pulling fumes and stale air out of your workspace.
Essential Personal Protective Equipment
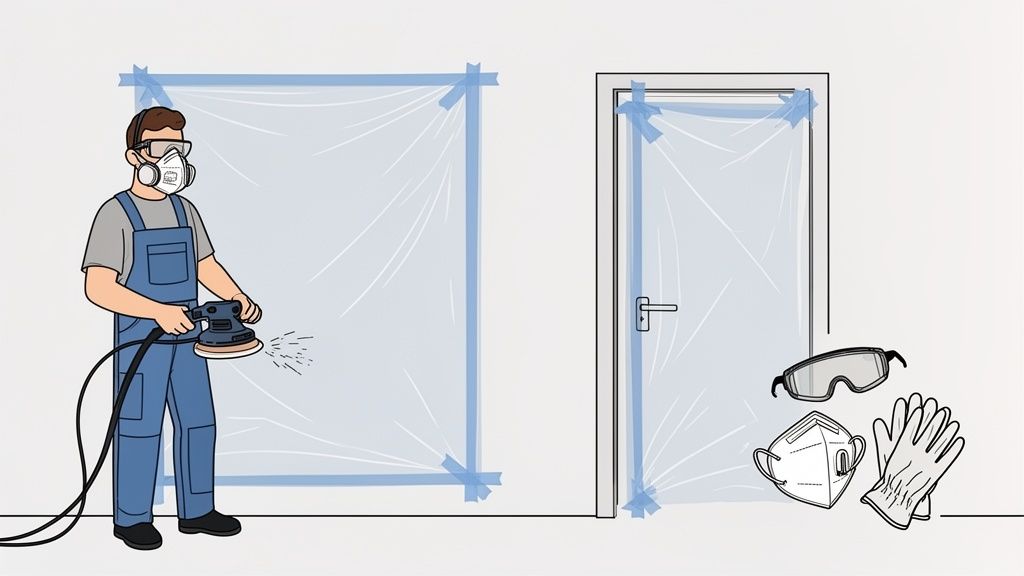
Personal Protective Equipment (PPE) isn't being fussy; it's just common sense. The dust kicked up from sanding old paint or plaster can be genuinely hazardous, full of fine particles you don’t want anywhere near your lungs.
Your basic safety kit should always have these three things:
- Dust Mask: Don't just grab any old paper mask. For sanding filler or old paint, you need one with at least an FFP2 rating. This ensures it’s actually filtering out the tiny dust particles that do the most harm.
- Safety Glasses: A decent pair of wraparound safety glasses will shield your eyes from dust, paint splashes, and any debris that flicks off a scraper. It happens more than you think.
- Gloves: When you’re using sugar soap or other chemical cleaners, a pair of durable nitrile gloves will save your skin from irritation.
This isn’t about being over-the-top cautious; it's about simple steps to protect yourself. You’ll find that many of the top tools every painter needs are actually safety-focused.
A professional decorator prioritises safety and cleanliness as much as the final finish. A safe worksite is an efficient worksite, preventing accidents and ensuring the focus remains on achieving a flawless result.
Professional Dust Control Secrets
Dust is the single biggest enemy of a clean decorating project. It gets everywhere—in carpets, on furniture, and even inside your electronics. The only way to win the battle is to control it at the source.
Professionals rely on a few key techniques to keep dust to an absolute minimum. The most effective method, by far, is a sanding system with built-in dust extraction. These tools connect directly to a workshop vacuum, capturing up to 95% of dust as it’s created. It’s an investment, sure, but it transforms the clean-up from a massive chore into a quick wipe-down.
If you don't have an extraction system, simple containment strategies still work wonders.
- Seal the room: Use painter's tape to seal thin plastic sheeting around the door frame. And don't forget to roll up a damp towel and place it along the bottom of the door.
- Cover everything: Use proper dust sheets to cover all your furniture and flooring. For big items you can't move, wrap them completely in plastic sheeting and tape them shut.
- Wet sanding: For smaller patches, using a damp sponge alongside your sandpaper helps trap dust, stopping it from becoming airborne in the first place.
By adopting these clean and safe practices, you’re not just preparing your walls for painting; you're running the entire project with professional care, right from the start.
Got Questions About Wall Prep? I've Got Answers
Even the best-laid plans can hit a snag. When you're in the thick of a decorating project, questions always bubble up, and getting the right advice is what stops a small hiccup from turning into a major headache. Let's tackle some of the most common questions I hear on the job, so you can push forward with confidence.
Think of this as having a seasoned decorator in your pocket, ready to clear up any confusion about stubborn cracks, sanding, or fresh plaster.
Do I Really Need to Sand a Wall Before Painting?
In a word, yes. For most jobs, it's non-negotiable. People think sanding is just for smoothing over filler, but its main job is to create a 'key'—a slightly roughened surface that the new paint can really grab onto. This is absolutely critical if your walls have any kind of sheen, like a silk or satin finish. Try to paint straight onto that, and your new coat will have nothing to grip; it'll be prone to peeling and scratching off down the line.
You don't need to go wild. A light scuff across the whole surface with 180-grit or 220-grit sandpaper is all it takes. This creates a microscopic texture that makes all the difference, ensuring a solid bond between the old wall and your new paint.
Can I Just Paint Over Small Cracks?
I know it's tempting to just slap some paint over a hairline crack and hope for the best, but trust me, it's a shortcut you'll regret. A thick coat of paint might hide it for a little while, but the crack is still there, lurking underneath. Houses move, temperatures change, and that crack will reappear, pulling your fresh paint apart and looking even worse than it did before.
Honestly, take the extra ten minutes to do it right. Rake it out slightly, fill it properly with a flexible decorator's caulk or a good quality filler, and sand it smooth. It's a permanent fix that guarantees the seamless, durable finish you're after.
A bit of advice I always give: an extra hour spent on prep will save you a whole weekend of repainting a failed job. Doing it right the first time is the ultimate time-saver.
What Is the Best Way to Clean Walls?
For most rooms, you can't go wrong with a classic: a simple solution of sugar soap and warm water, applied with a big sponge. The trick is to work in sections from the top down, then rinse with a separate sponge and clean water. This stops you from leaving any soapy residue behind, which can interfere with the paint.
That said, not all grime is created equal, so you might need to adapt your approach:
- Kitchens: You're battling an invisible film of cooking grease. A dedicated degreasing cleaner is your best bet here to really cut through it.
- Bathrooms: If you spot any black or grey specks of mildew, tackle those areas with a proper mould and mildew remover before you start the main clean.
- Smokers' Homes: Nicotine leaves a nasty, oily residue. You'll need a strong sugar soap solution, followed by a stain-blocking primer. If you skip the primer, that yellowing will bleed straight through your new paint.
No matter what, always let the walls dry out completely before you even think about picking up filler or sandpaper.
How Long Should I Wait Before Painting New Plaster?
This is a big one, and the answer is almost always "longer than you think." Fresh plaster is absolutely saturated with water, and it has to dry out naturally. If you paint too soon, you trap that moisture inside the wall, which is a one-way ticket to bubbling, peeling paint and potentially even damp problems down the road.
As a rule of thumb, you need to allow at least one week of drying time for every 5mm of plaster thickness. In a typical British home, that usually means waiting a good 3-4 weeks. You'll know it's ready when the plaster has turned a uniform, pale pinkish colour, with no dark, damp patches left. Be patient—it's worth it.
Feeling confident about the prep but want a guaranteed professional finish without the hassle? The team at All Well Property Services has the expertise to handle every aspect of your decorating project, from meticulous preparation to the final flawless coat. Let us take care of the details so you can enjoy a beautifully transformed space. Find out more about our professional painting and decorating services.
Article created using Outrank