


Moving out of a London rental is stressful enough without the added worry of losing your deposit over cleaning disputes. Landlords and letting agents in the capital maintain notoriously high standards, where the condition of a property directly impacts its value and desirability. A simple tidy-up won't suffice; what’s required is a forensic, top-to-bottom deep clean that meticulously restores the property to the state documented in the original inventory report. Failing to meet these exacting standards is one of the most common reasons for deposit deductions across the city.
This definitive end of tenancy cleaning checklist is meticulously crafted for London renters, landlords, and property managers. It addresses the unique challenges of the city's diverse housing stock, from modern flats in Canary Wharf to period conversions in Kensington with delicate features. We've structured this guide to be more than just a list; it's a strategic plan designed to ensure you pass the final inspection with confidence.
We will break down the ten most critical areas that professional inventory clerks and landlords scrutinise, providing actionable, room-by-room instructions. You will learn the correct order of tasks to maximise efficiency, the specific products needed for stubborn issues like limescale and grease, and the professional techniques that make a tangible difference. This guide provides a clear pathway to securing your full deposit, whether you're tackling the clean yourself or briefing a professional service. Let’s get started on making your move-out clean a guaranteed success and safeguarding your money.
1. Kitchen Deep Clean and Degreasing
The kitchen is often the first and most scrutinised room during an end-of-tenancy inspection. Accumulated grease, food residue, and limescale can make a property feel neglected and may lead to significant deposit deductions. A thorough kitchen deep clean and degreasing is therefore non-negotiable and a cornerstone of any successful end of tenancy cleaning checklist.
This process goes far beyond a standard wipe-down. It involves using powerful, often commercial-grade, degreasing agents to break down stubborn, baked-on grease from all surfaces, particularly those near cooking areas. This is crucial for restoring the kitchen to its original move-in condition, a key requirement in most tenancy agreements across London. Landlords and letting agents expect every surface, from the inside of the oven to the top of the cupboards, to be free of grime.
For example, a typical Victorian conversion in Islington with a compact kitchen can see years of cooking residue build up on extractor fans and splashbacks. A proper degreasing service ensures these are brought back to a pristine, hygienic state, ready for the next tenants.

How to Achieve a Professional Kitchen Deep Clean
To ensure your kitchen passes inspection, focus on these critical tasks:
- Extractor Hood and Filter: This is a major hotspot for grease. Remove the metal filter and soak it in a solution of hot water and a strong degreaser. While it soaks, thoroughly clean the interior and exterior of the hood itself.
- Hob and Oven: Remove all racks and trays from the oven and clean them separately. Apply a specialised oven cleaner to the interior, paying close attention to the door glass and seals. For the hob, remove any rings or covers and scrub away all burnt-on food.
- Cupboards and Cabinets: Empty all cupboards and clean them inside and out. Pay special attention to the tops, which are often missed and collect a sticky layer of dust and grease. Wipe down all handles and hinges.
- Appliances: Pull out freestanding appliances like the fridge and washing machine to clean behind and beneath them. Deep clean the inside of the fridge, microwave, and dishwasher, removing all food traces and odours.
- Surfaces and Splashbacks: Use your degreasing solution on all worktops, tiles, and splashbacks. Use a non-abrasive scourer for tough spots to avoid scratching the surface. Finally, clean and descale the sink and taps, polishing them to a high shine.
2. Bathroom Grout and Tile Sanitisation
Next to the kitchen, the bathroom is a high-scrutiny area where hygiene is paramount. Grout lines, being porous, are notorious for trapping moisture, soap scum, and bacteria, leading to unsightly mould, mildew, and discolouration. A thorough grout and tile sanitisation is a critical part of any end of tenancy cleaning checklist as it directly impacts the perceived cleanliness and hygiene of the property.
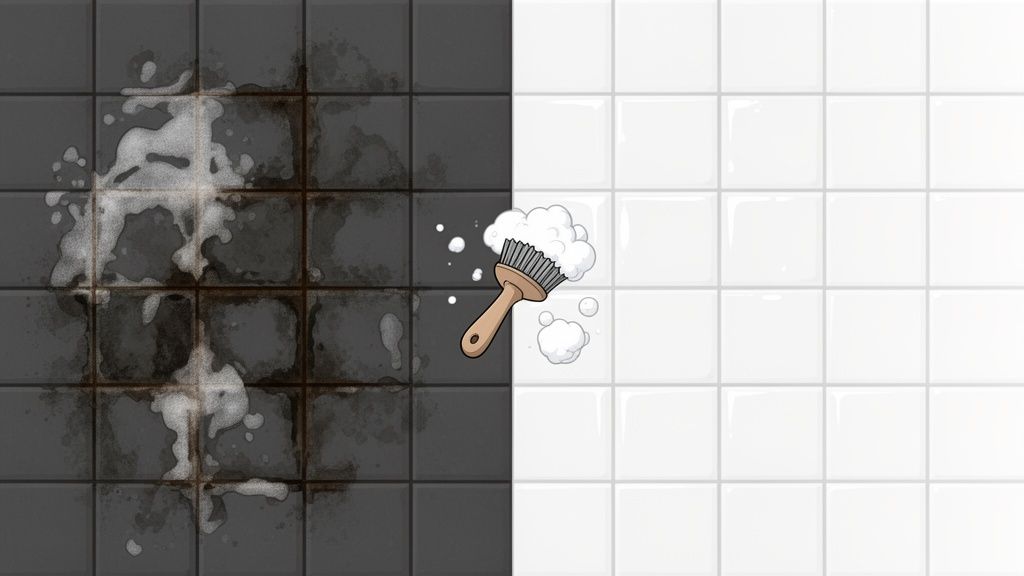

This process involves more than just wiping tiles; it requires targeted chemical action and detailed scrubbing to restore grout to its original colour and eliminate harmful bacterial growth. Landlords and inventory clerks will closely inspect shower enclosures, areas around the bath, and tiled floors for any signs of black mould or pink soap mildew, which are common reasons for deposit deductions. A sanitised bathroom not only looks pristine but is also essential for the health of incoming tenants.
For instance, restoring the original 1920s tiles in a Victorian bathroom in a South London property requires careful yet effective grout treatment. Professional cleaning can revive these period features without damage, satisfying both the landlord's expectations and heritage property requirements, ensuring a smooth checkout process.
How to Achieve Professional Grout and Tile Sanitisation
To ensure your bathroom tiles and grout pass inspection, focus on these essential tasks:
- Initial Surface Clean: Start by cleaning the tiles with a general bathroom cleaner to remove loose dirt, hair, and soap scum. This prepares the surface for deeper grout treatment.
- Target Mould and Mildew: For mild cases, apply undiluted white vinegar or a paste of oxygen-based cleaner (like OxiClean) and water. For stubborn black mould, use a commercial mould and mildew remover, ensuring the area is well-ventilated and following safety instructions precisely.
- Scrub the Grout Lines: Use a stiff-bristled grout brush or an old toothbrush to work the cleaning solution directly into the grout lines. Apply firm pressure to agitate and lift the embedded grime and mould spores.
- Rinse and Dry Thoroughly: Once you have scrubbed all the grout, rinse the entire area with clean water to remove any chemical residue. It is crucial to dry the tiles and grout completely with a microfibre cloth to prevent moisture from settling back in and encouraging new mould growth.
- Polish Fixtures: Finish by cleaning and polishing all taps, shower heads, and chrome fixtures to a high shine, leaving the entire room looking immaculate and well-maintained.
3. Window and Frame Cleaning Including Sills
Immaculate windows can dramatically lift the appearance of a property, letting in more light and giving an impression of overall cleanliness. During an inspection, windows are one of the most visible elements, and smudges, dust, or grime on the glass, frames, and sills are immediately noticeable. For London properties, pollution and weather can leave a stubborn film that requires more than a simple wipe-down, making this a critical component of any end of tenancy cleaning checklist.
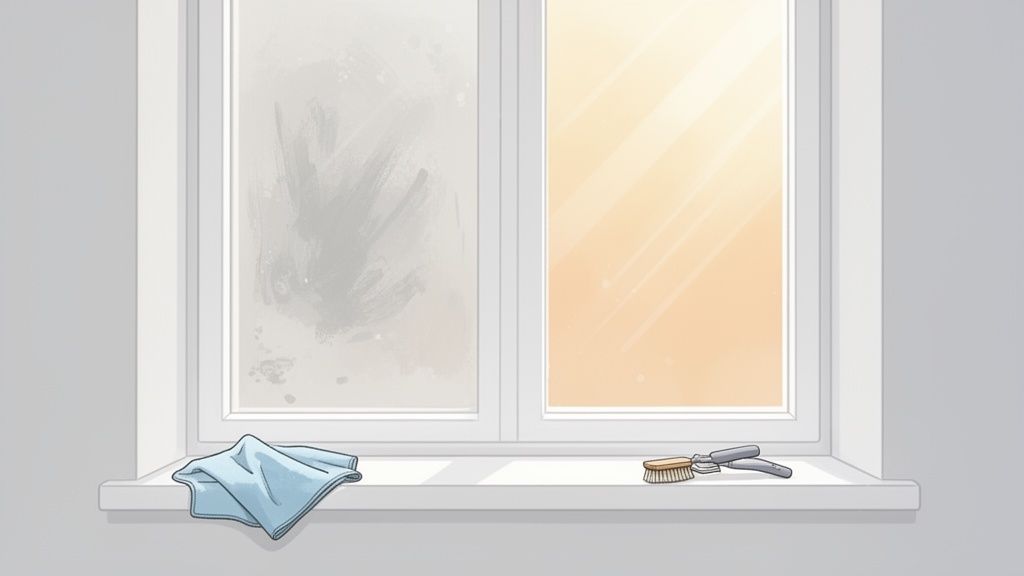
The task involves a thorough cleaning of all interior window panes, frames, sills, and tracks to remove dirt, condensation marks, and sediment buildup. Landlords expect windows to be streak-free and clear, allowing them to present the property in its best possible light for viewings and new tenants. This is especially true for period properties, where well-maintained windows are a key feature.
For example, cleaning the large Edwardian sash windows in a Clapham flat not only removes years of city grime but also showcases the original glass quality, a crucial detail for a heritage property handover. Similarly, a London terrace property with over a dozen windows requires a systematic deep clean to ensure it is ready for professional photography before being re-listed on the rental market. If you notice damage during cleaning, it's wise to understand when to get your window sills repaired to avoid any deposit disputes.
How to Achieve Professional Window Cleaning Results
To ensure your windows meet the high standards of an inventory check, follow these essential steps:
- Prepare the Area: Before starting, use a brush and a vacuum cleaner to remove all loose dirt, dust, and cobwebs from the window tracks, frames, and sills. This prevents turning dust into a muddy mess when you introduce cleaning solutions.
- Use the Right Solution: A simple solution of one part white vinegar to one part water is highly effective for cutting through grime and removing hard water stains. For greasy buildup on frames, especially in kitchens, a mild degreaser may be necessary.
- Work from Top to Bottom: Always clean the frames first, then the glass. When cleaning the glass, work from the top down to prevent drips from streaking surfaces you have already cleaned.
- Achieve a Streak-Free Finish: A squeegee is the professional's tool of choice for a flawless finish. Wipe the blade after each pass. Alternatively, use a clean microfibre cloth or even crumpled newspaper to buff the glass dry and eliminate any remaining streaks.
- Choose the Right Day: If possible, clean your windows on an overcast day. Direct sunlight can cause your cleaning solution to dry too quickly, which is a primary cause of streaking.
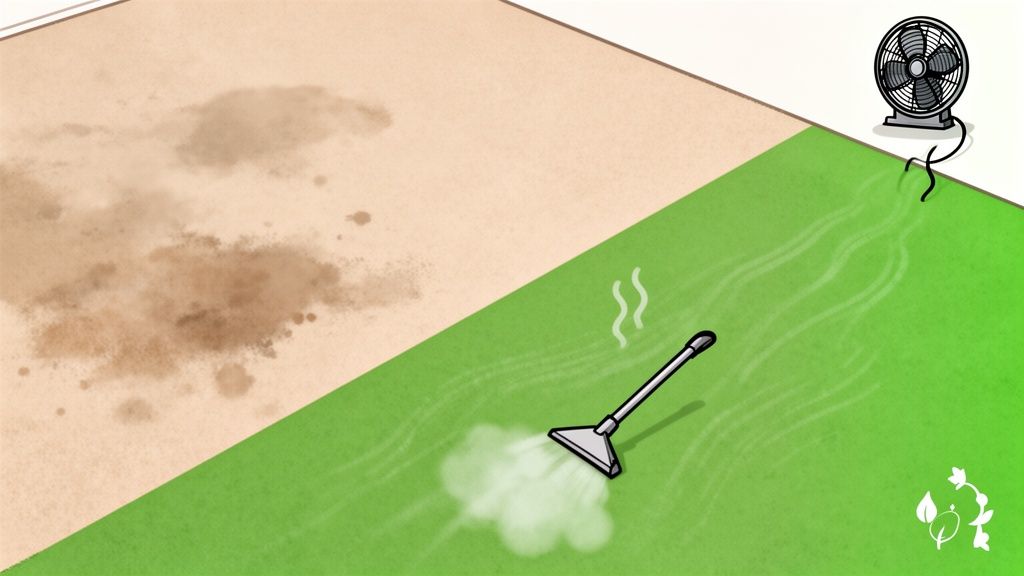
4. Carpet and Floor Deep Cleaning
Flooring, particularly carpets, often bears the brunt of daily life during a tenancy and is a frequent point of contention in deposit disputes. Embedded dirt, stains, allergens, and lingering odours can make a property feel unhygienic and poorly maintained. A professional-grade deep clean is essential to restore floors to their original condition and is a critical component of any comprehensive end of tenancy cleaning checklist.
This process involves more than just a standard vacuum. It requires specialised equipment, such as hot water extraction machines, and targeted treatments to tackle specific issues like stains and bacteria. Landlords and letting agents will meticulously inspect carpets for signs of wear and tear beyond what is considered reasonable, and a professional clean demonstrates a tenant's commitment to returning the property in an acceptable state, significantly improving the chances of a full deposit return.
For instance, an Islington flat that has housed tenants with pets may have stubborn odours and stains that only professional enzymatic treatments can fully remove. Similarly, high-traffic areas in student housing across London require a deep clean between tenancies to lift accumulated grime and restore the carpet's appearance for the next occupants.
How to Ensure Your Floors Pass Inspection
To meet the high standards of a move-out inspection, concentrate on these key flooring tasks:
- Professional Carpet Cleaning: Hire an IICRC-certified company that uses hot water extraction (steam cleaning). This method is highly effective at removing deep-seated dirt, allergens, and bacteria from carpet fibres. Schedule this for after all other cleaning is complete, allowing 2-3 days for the carpets to dry fully before the final inspection.
- Targeted Stain Removal: Address any visible stains immediately. For organic stains from pets, food, or drink, use an enzyme-based cleaner designed to break down the proteins causing the stain and odour. Always test any cleaning solution on an inconspicuous area first.
- Hard Floor Care: All hard flooring (wood, laminate, tile, vinyl) must be thoroughly swept and mopped. Use a pH-neutral cleaner suitable for the specific floor type to avoid causing damage. Pay close attention to corners, edges, and underneath furniture.
- Grout Cleaning: For tiled floors in kitchens and bathrooms, scrub the grout lines with a stiff brush and a specialised grout cleaner or a paste of bicarbonate of soda and water to remove discolouration and mildew.
- Documentation: Always obtain a detailed receipt or a written cleaning report from your professional carpet cleaners. This, along with before-and-after photos, serves as crucial evidence for your landlord or letting agent that you have fulfilled your obligations.
5. Wall and Paintwork Inspection and Touch-Up Cleaning
Often overlooked in favour of more obvious areas like kitchens and bathrooms, the condition of the walls and paintwork is a primary focus for landlords and inventory clerks. Scuffs, marks, fingerprints, and stains can quickly accumulate during a tenancy and are considered evidence of more than just 'fair wear and tear', potentially leading to deposit deductions. A systematic inspection and cleaning of these surfaces is a vital component of any comprehensive end of tenancy cleaning checklist.
This task involves more than just a quick wipe. It requires a careful assessment to distinguish between marks that can be cleaned and damage that may require repainting. For landlords, clean, unmarked walls signify a well-maintained property, making it immediately appealing to prospective tenants. It restores a sense of freshness and newness to the entire space, which is a key objective of the end-of-tenancy process.
For instance, in a Victorian terraced house in Wandsworth, careful cleaning can remove years of scuffs from hallways and stairwells, often revealing the original period colour beneath. This simple act can dramatically improve the property's presentation without the need for a full repaint, saving both time and money.
How to Professionally Clean Walls and Paintwork
To ensure your walls and paintwork pass the final inspection, follow these critical steps:
- Test Cleaning Solutions: Before applying any cleaner to a large area, always test it on an inconspicuous spot, such as behind a door or inside a wardrobe. This prevents accidental damage or discolouration to the paint finish.
- Handle Scuff Marks: For common scuff marks from furniture or shoes, a melamine foam sponge (often called a Magic Eraser) is incredibly effective. Dampen the sponge slightly and gently rub the mark until it disappears.
- General Grime and Fingerprints: For general dirt, dust, and fingerprints, especially around light switches and door frames, use a soft cloth with a solution of warm water and a small amount of mild detergent. Wring the cloth out well to avoid leaving water marks.
- Tackle Stubborn Stains: For tougher stains like ink or marker, apply a small amount of rubbing alcohol to a cotton swab and dab the area gently. For greasy or waxy stains like crayon, a mild degreasing solution can be effective.
- Remove Adhesive Residue: If you've used adhesive hooks or tape, remove any leftover sticky residue with a dedicated adhesive remover. Apply it sparingly with a cloth, following the product instructions carefully. For a more detailed guide on preparing paintwork, you can find helpful tips in our end-of-tenancy painting checklist.
- Document Unremovable Damage: If you encounter damage like deep scratches, chips, or stains that cannot be cleaned, document them with clear photographs. This provides evidence for your discussion with the landlord or letting agent regarding fair wear and tear.
6. Door and Hardware Sanitization
High-touch surfaces like doors, handles, and switches are often overlooked during a standard clean, yet they are meticulously checked during move-out inspections. These areas accumulate fingerprints, grime, and pathogens, and cleaning them thoroughly is a critical part of a comprehensive end of tenancy cleaning checklist. A failure to address these details can leave a property feeling unhygienic and poorly maintained.
This task involves more than a quick wipe. It requires the systematic cleaning and sanitising of all interior and exterior doors, door frames, handles, hinges, locks, and light switches. In the post-pandemic era, letting agents and landlords in London place a greater emphasis on hygiene, expecting these surfaces to be not just visibly clean but also sanitised, ensuring the property is safe and ready for the next occupants.
For instance, in a high-traffic shared apartment building in Canary Wharf, the systematic sanitisation of all door hardware between tenancies is a standard protocol to uphold property hygiene standards. This attention to detail demonstrates a commitment to tenant welfare and contributes significantly to a positive final inspection report, helping to secure the full return of your deposit.
How to Achieve Professional Door and Hardware Sanitization
To ensure every high-touch point is immaculate, focus on these specific actions:
- Wipe Down All Doors and Frames: Start by wiping down the entire surface of every door, including the top edge where dust settles. Pay close attention to the areas around handles, which often have scuffs and fingerprints. Use a suitable cleaner for the door's material (e.g., wood cleaner or a mild all-purpose solution).
- Clean and Polish Hardware: Use a microfibre cloth to clean and polish all door handles, knobs, locks, and hinges. A dedicated metal polish can be used on brass or chrome fittings to remove tarnish and restore their shine, but avoid abrasive products that could cause scratches.
- Sanitise High-Touch Points: After cleaning, sanitise all handles, light switches, and push plates. Use a disinfectant wipe or a cloth lightly sprayed with a 70% isopropyl alcohol solution. This is effective for killing germs without damaging most surfaces.
- Address Electrical Fittings Safely: When cleaning light switches and socket plates, never spray liquid directly onto them. Instead, apply a small amount of cleaner to a cloth or use a disinfectant wipe, ensuring no moisture enters the electrical components.
- Don't Forget Skirting Boards: While cleaning doors and frames, take the opportunity to wipe down the adjacent skirting boards, which often collect dust and scuff marks, completing the look of a professionally cleaned room.
7. Bathroom Fixtures and Surfaces Deep Clean
Alongside the kitchen, the bathroom is a primary focus during the final property inspection. Landlords and agents will meticulously check for limescale, soap scum, and mould, as these issues indicate a lack of deep cleaning. A comprehensive clean of all bathroom fixtures and surfaces is an essential part of any end of tenancy cleaning checklist to ensure the space is hygienic and visually pristine.
This task involves more than just a quick wipe. It requires intensive cleaning to remove stubborn mineral deposits, soap residue, and bacteria from every corner. From the toilet bowl and sink to the shower screen and bathtub, every fixture must be descaled, sanitised, and polished to restore its original condition. Neglecting this can easily lead to tenancy deposit disputes, as a poorly maintained bathroom is immediately noticeable.
For instance, properties in hard water areas of South London, such as Croydon or Sutton, often suffer from significant limescale build-up on taps and shower heads. A professional-level clean addresses this accumulation, restoring functionality and shine, and demonstrating that the property has been cared for properly.
How to Achieve a Professional Bathroom Deep Clean
To guarantee your bathroom meets the high standards of an inventory check-out, concentrate on these vital steps:
- Toilets, Sinks, and Baths: Deep clean the toilet bowl, seat, lid, and exterior base. Thoroughly clean and descale sinks and bathtubs, paying close attention to plug holes and overflows where grime collects.
- Showers and Taps: Use a powerful descaling agent on the shower head, hose, and screen. For stubborn limescale, apply the cleaner and allow it to sit for 10-15 minutes before scrubbing. Use an old toothbrush to clean around the base of taps and in hard-to-reach areas.
- Tiles and Grout: Scrub all wall and floor tiles to remove soap scum and watermarks. Use a specialised grout cleaner and a stiff brush to tackle any discolouration or mould spots between the tiles.
- Mirrors and Cabinets: Clean and polish all mirrors, ensuring they are streak-free. Empty and wipe down the inside and outside of all bathroom cabinets, vanity units, and shelves.
- Polishing and Finishing: Once all surfaces are clean and dry, use a clean microfibre cloth to polish chrome fixtures like taps, shower controls, and towel rails to a high shine. For more ideas, explore our guide on how to refresh a bathroom.
8. Appliance Interior and Exterior Cleaning
Appliances are high-value items in any rental property, and their condition is meticulously checked during the final inspection. A landlord will assess both the functionality and cleanliness of every appliance, from the refrigerator to the washing machine. Neglecting them can lead to substantial deposit deductions for professional cleaning or even replacement, making this a critical part of any end of tenancy cleaning checklist.
This task involves a comprehensive, two-part process: deep cleaning the interior to remove food residue, mould, limescale, and odours, and meticulously polishing the exterior to eliminate fingerprints, grease, and grime. The goal is to return each appliance to a hygienic, near-showroom condition, ensuring it is ready for immediate use by the next tenant. This demonstrates respect for the property and is a clear indicator of a well-maintained tenancy.
For instance, in a modern flat in Canary Wharf featuring high-end stainless steel appliances, using the correct non-abrasive cleaners is vital to avoid scratches and restore the original finish. Similarly, a family home in Clapham might have a well-used washing machine that requires a descaling cycle to remove limescale build-up common with London's hard water, preventing future maintenance issues for the landlord.

How to Professionally Clean Your Appliances
To ensure your appliances meet the stringent standards of a tenancy checkout report, follow these detailed steps:
- Refrigerator and Freezer: Empty the appliance completely and remove all shelves and drawers, washing them separately in warm, soapy water. Clean the interior with a food-safe solution, such as bicarbonate of soda and water, paying close attention to rubber seals where mould can gather. Defrost the freezer if necessary and wipe it dry.
- Oven and Hob: This is covered in more detail in our Kitchen Deep Clean section, but as a summary: use a powerful, specialised oven cleaner on the interior, racks, and glass door. For the hob, scrub away all burnt-on food and polish the surface.
- Dishwasher: Clean the filter at the bottom of the machine to remove trapped food particles. Run an empty, hot cycle with a dedicated dishwasher cleaner or a cup of white vinegar placed on the top rack to eliminate grease, limescale, and odours.
- Washing Machine: Clean the detergent drawer thoroughly. Wipe the rubber seal around the door, checking for mould. Run a hot maintenance wash with a washing machine descaler or white vinegar to clear out internal pipes.
- Exterior Surfaces: For all appliances, wipe down the exterior, handles, and controls. Use a specialised stainless steel cleaner for relevant surfaces to leave a streak-free, polished finish. Remember to pull out freestanding appliances to clean the floor underneath and the wall behind them.
9. Flooring and Baseboard Deep Cleaning
Floors and baseboards (skirting boards) are subjected to constant wear and tear, and their condition is a major focal point during the final property inspection. Scuff marks, ingrained dirt, and dusty baseboards can give an immediate impression of a poorly maintained property, jeopardising your deposit return. A comprehensive deep clean of all flooring is an essential part of any end of tenancy cleaning checklist.
This task requires more than a quick vacuum and mop. It involves using the correct cleaning methods and products for each specific floor type, from delicate original hardwood to durable modern tiling. Landlords expect floors to be free of all marks, stains, and build-up, and for baseboards to be wiped clean of all dust and scuffs. This detailed approach restores the property’s overall sense of cleanliness and readiness for new occupants.
For instance, a modern apartment in Canary Wharf might feature a mix of engineered hardwood, porcelain tiles, and laminate. Each surface demands a different cleaning technique to avoid damage and achieve a professional finish, a detail that property managers will not overlook.
How to Professionally Clean Floors and Baseboards
To guarantee your floors and baseboards meet the required standard, concentrate on these key actions:
- Identify Floor Types: Before starting, determine the type of flooring in each room (hardwood, laminate, vinyl, tile, etc.). Using the wrong cleaner can cause irreversible damage, such as stripping the sealant from wood or dulling the finish on laminate.
- Hardwood Floor Care: Use a pH-neutral cleaner specifically formulated for hardwood. Always use a damp, not soaking wet, microfibre mop to prevent water from seeping between the planks and causing swelling or warping.
- Laminate and Vinyl: Follow the manufacturer’s cleaning recommendations. Generally, a simple solution of water and a small amount of mild, approved cleaner is sufficient. Avoid wax-based products or harsh detergents.
- Tile and Grout: Use a suitable tile cleaner and a grout brush to scrub away any discolouration or mildew between the tiles, particularly in kitchens and bathrooms.
- Baseboard Detailing: This is a frequently missed but critical step. Use a slightly damp cloth with a mild cleaning solution to wipe down all baseboards, removing dust, grime, and any scuff marks. A magic eraser can be effective for stubborn marks on painted skirting.
10. External Areas and Outdoor Space Cleaning
The exterior of a property creates the first and last impression during an inspection. Neglected gardens, grimy patios, and cluttered balconies can suggest a lack of care for the entire property, potentially influencing the final report. Cleaning external areas is a critical, yet often overlooked, part of a comprehensive end of tenancy cleaning checklist.
This task involves more than just a quick sweep. It requires a thorough tidying and deep cleaning of all outdoor spaces, including patios, decking, pathways, and any associated furniture. The goal is to present these areas as clean, safe, and inviting, ensuring they meet the move-in standard expected by landlords and the next tenants. This is particularly important for ground-floor flats or terraced houses in London, where private outdoor space is a highly valued feature.
For example, a ground-floor flat in Clapham with a small patio will require algae and moss removal to be considered acceptable. Similarly, a terraced house in Fulham with decking must have it professionally cleaned to remove dirt build-up and restore its appearance, ensuring the property's curb appeal is maximised for the final inspection.

How to Professionally Clean Outdoor Spaces
To ensure your external areas pass inspection with flying colours, concentrate on these key tasks:
- Patios and Decking: Sweep away all leaves, dirt, and debris. Use a pressure washer to remove ingrained grime, algae, and moss. Always test the pressure washer on a small, hidden area first to avoid damaging the surface. For delicate materials like certain types of wood or sandstone, consider a soft wash with an appropriate cleaning solution.
- Garden and Lawn: Remove all rubbish, fallen leaves, and weeds from garden beds. The lawn should be neatly mown, and any pathways or borders should be clearly defined and tidy.
- Walls, Fences, and Windows: Wipe down any external walls, fences, and gates to remove cobwebs and dirt. Clean the exterior of all accessible windows and doors, including the frames and sills, leaving them streak-free.
- Furniture and Drains: If any outdoor furniture is included in the tenancy, it must be thoroughly wiped down and cleaned. Crucially, check and clear all external drains and gutters of leaves and blockages to ensure proper drainage.
- Bin Storage Areas: The area where bins are kept is a magnet for dirt and pests. It must be thoroughly swept, disinfected, and deodorised to leave it in a hygienic condition.
10-Point End-of-Tenancy Cleaning Comparison
| Service | 🔄 Implementation Complexity | ⚡ Resource Requirements & Speed | ⭐ Expected Outcome (Quality) | 📊 Ideal Use Cases | 💡 Key Advantages / Tips |
|---|---|---|---|---|---|
| Kitchen Deep Clean and Degreasing | 🔄 High — multi-step degreasing, oven work, delicate finishes | ⚡ High — commercial degreasers, scrapers, time-intensive for heavy buildup | ⭐⭐⭐⭐⭐ Restores appearance; prevents deposit loss | 📊 End-of-tenancy kitchens, commercial handovers, high-use rentals | 💡 Use commercial degreasers; test products; allow dwell time |
| Bathroom Grout and Tile Sanitization | 🔄 Medium–High — targeted grout and mold removal | ⚡ Moderate — grout brushes, antifungal cleaners, ventilation needed | ⭐⭐⭐⭐ Deep sanitization; restores grout colour and hygiene | 📊 Moldy/discoloured bathrooms; heritage tiles; multi-unit sanitization | 💡 Use oxygen cleaners/vinegar; avoid mixing bleach; consider resealing |
| Window and Frame Cleaning Including Sills | 🔄 Medium — interior/exterior work; safety on upper floors | ⚡ Moderate–High — ladders, squeegees, weather-dependent scheduling | ⭐⭐⭐⭐ Improves light and presentation; reveals seal condition | 📊 Heritage sash windows, high-visibility properties, photography prep | 💡 Clean on overcast days; squeegee + microfiber; clear tracks first |
| Carpet and Floor Deep Cleaning | 🔄 Medium–High — hot-water extraction, stain treatment | ⚡ High — steam extractors, air movers, certified operators; drying time 6–24h | ⭐⭐⭐⭐ Removes allergens/odours; may not remove permanent stains | 📊 Student housing, pet-stained carpets, pre-move-out deep clean | 💡 Schedule 2–3 days before inspection; use IICRC-certified cleaners |
| Wall and Paintwork Inspection and Touch-Up Cleaning | 🔄 Medium — assess vs repaint; careful cleaning methods | ⚡ Low–Moderate — cleaning supplies, touch-up paint when required | ⭐⭐⭐ Often resolves marks; may identify repainting needs | 📊 Quick end-of-tenancy fixes; rooms where original paint is preserved | 💡 Test solutions first; use Magic Eraser; photograph unrecoverable damage |
| Door and Hardware Sanitization | 🔄 Low–Medium — many small high-touch items | ⚡ Low — disinfectants, microfiber cloths; quick per door | ⭐⭐⭐⭐ Improves hygiene & appearance; supports health compliance | 📊 Communal properties, post-pandemic protocols, commercial spaces | 💡 Use 70% isopropyl for most surfaces; avoid bleach on brass |
| Bathroom Fixtures and Surfaces Deep Clean | 🔄 High — acidic descaling, mildew removal, finish care | ⚡ Moderate–High — descalers, protective gear, ventilation required | ⭐⭐⭐⭐ Restores shine and hygiene; prevents plumbing issues | 📊 Hard-water areas, long-tenancy bathrooms, period fixtures | 💡 Use citric acid/vinegar or commercial descaler; ventilate and wear gloves |
| Appliance Interior and Exterior Cleaning | 🔄 Medium — varied appliance types and access issues | ⚡ Moderate — food-safe cleaners, parts removal, time per unit | ⭐⭐⭐⭐ Restores function/appearance; may expose need for repairs | 📊 Kitchens with built-ins, pre-handover appliance checks | 💡 Use food-safe products; consult manuals; replace filters as needed |
| Flooring and Baseboard Deep Cleaning | 🔄 Medium–High — type-specific methods (wood, tile, vinyl) | ⚡ Moderate — pH-neutral cleaners, mop systems; possible sealing | ⭐⭐⭐⭐ Reveals true floor condition; reduces deposit risks | 📊 Mixed-floor properties, heritage hardwoods, commercial floors | 💡 Avoid excess water on hardwood; use manufacturer-approved cleaners |
| External Areas and Outdoor Space Cleaning | 🔄 Medium — pressure/soft washing, moss removal, safety concerns | ⚡ High — pressure washers, detergents, weather-dependent; time-consuming | ⭐⭐⭐⭐ Significantly improves curb appeal; removes algae/moss | 📊 Patios, decking, entranceways, pre-photography or tenant move-in | 💡 Use soft wash on delicate surfaces; test pressure; choose eco detergents |
From Checklist to Cheque: Ensuring a Smooth Handover
Navigating the end of a tenancy agreement can feel like a final, monumental hurdle, but with the comprehensive guide we have laid out, you are now equipped to tackle it with confidence. The transition from a well-loved home to your next chapter should be smooth, not stressful. The ultimate goal is simple: leave the property in a state that is as good as, or better than, when you first moved in, ensuring the full and prompt return of your security deposit.
This journey begins with a methodical approach. Our detailed, room-by-room end of tenancy cleaning checklist is more than just a list of tasks; it is a strategic framework designed to eliminate guesswork and prevent costly oversights. From degreasing the kitchen extractor fan to descaling every tap and showerhead, each item is a crucial piece of the puzzle. The timed task order provided is specifically structured to maximise efficiency, preventing you from having to re-clean areas and saving you precious hours during a busy move.
Key Takeaways for Deposit Success
Remember, the difference between a successful handover and a deposit dispute often lies in the details that are easiest to overlook. Landlords and letting agents, particularly in the competitive London market, have a trained eye for specifics.
- Documentation is Your Defence: Your most powerful tool is evidence. Before you even lift a sponge, locate your original move-in inventory report. As you complete your clean, take clear, well-lit 'after' photographs of every room, appliance, and surface. This before-and-after documentation creates a powerful, undeniable record of your diligence should any discrepancies arise.
- Acknowledge 'Fair Wear and Tear' vs. Negligence: Understand the distinction. Minor scuffs on a wall in a high-traffic hallway may be considered fair wear and tear. However, significant stains on the carpet, limescale-encrusted taps, or a grimy oven are typically classified as issues requiring a professional-level clean, the cost of which can be deducted from your deposit.
- The Professional vs. DIY Calculation: Be honest about your time, energy, and the required standard. While a DIY approach can save money, a professional clean guarantees a result that meets agency standards. For high-stakes tasks like professional carpet steam cleaning or a deep oven clean, investing in a specialist service is often the most cost-effective decision in the long run. It removes the burden from you and provides a receipt as proof of professional service.
Ultimately, mastering your end of tenancy clean is about more than just securing a cheque. It’s about fulfilling your contractual obligations, leaving on positive terms, and securing a glowing reference that will be invaluable for your future rental applications. By transforming our extensive end of tenancy cleaning checklist from a document into a completed action plan, you are not just cleaning a property; you are professionally closing a significant chapter and setting the stage for a successful move. Your diligence and thoroughness at this final stage are a direct investment in your financial and rental future.
When your end-of-tenancy requirements go beyond cleaning to include minor repairs, painting, or a full refresh to meet exacting standards, consider a partner who can manage it all. All Well Property Services offers comprehensive solutions, from professional cleaning to decorating and repairs, streamlining the entire handover process to ensure your London property is left in impeccable condition. Visit us at All Well Property Services to see how we can guarantee a flawless finish and help secure your full deposit return.